
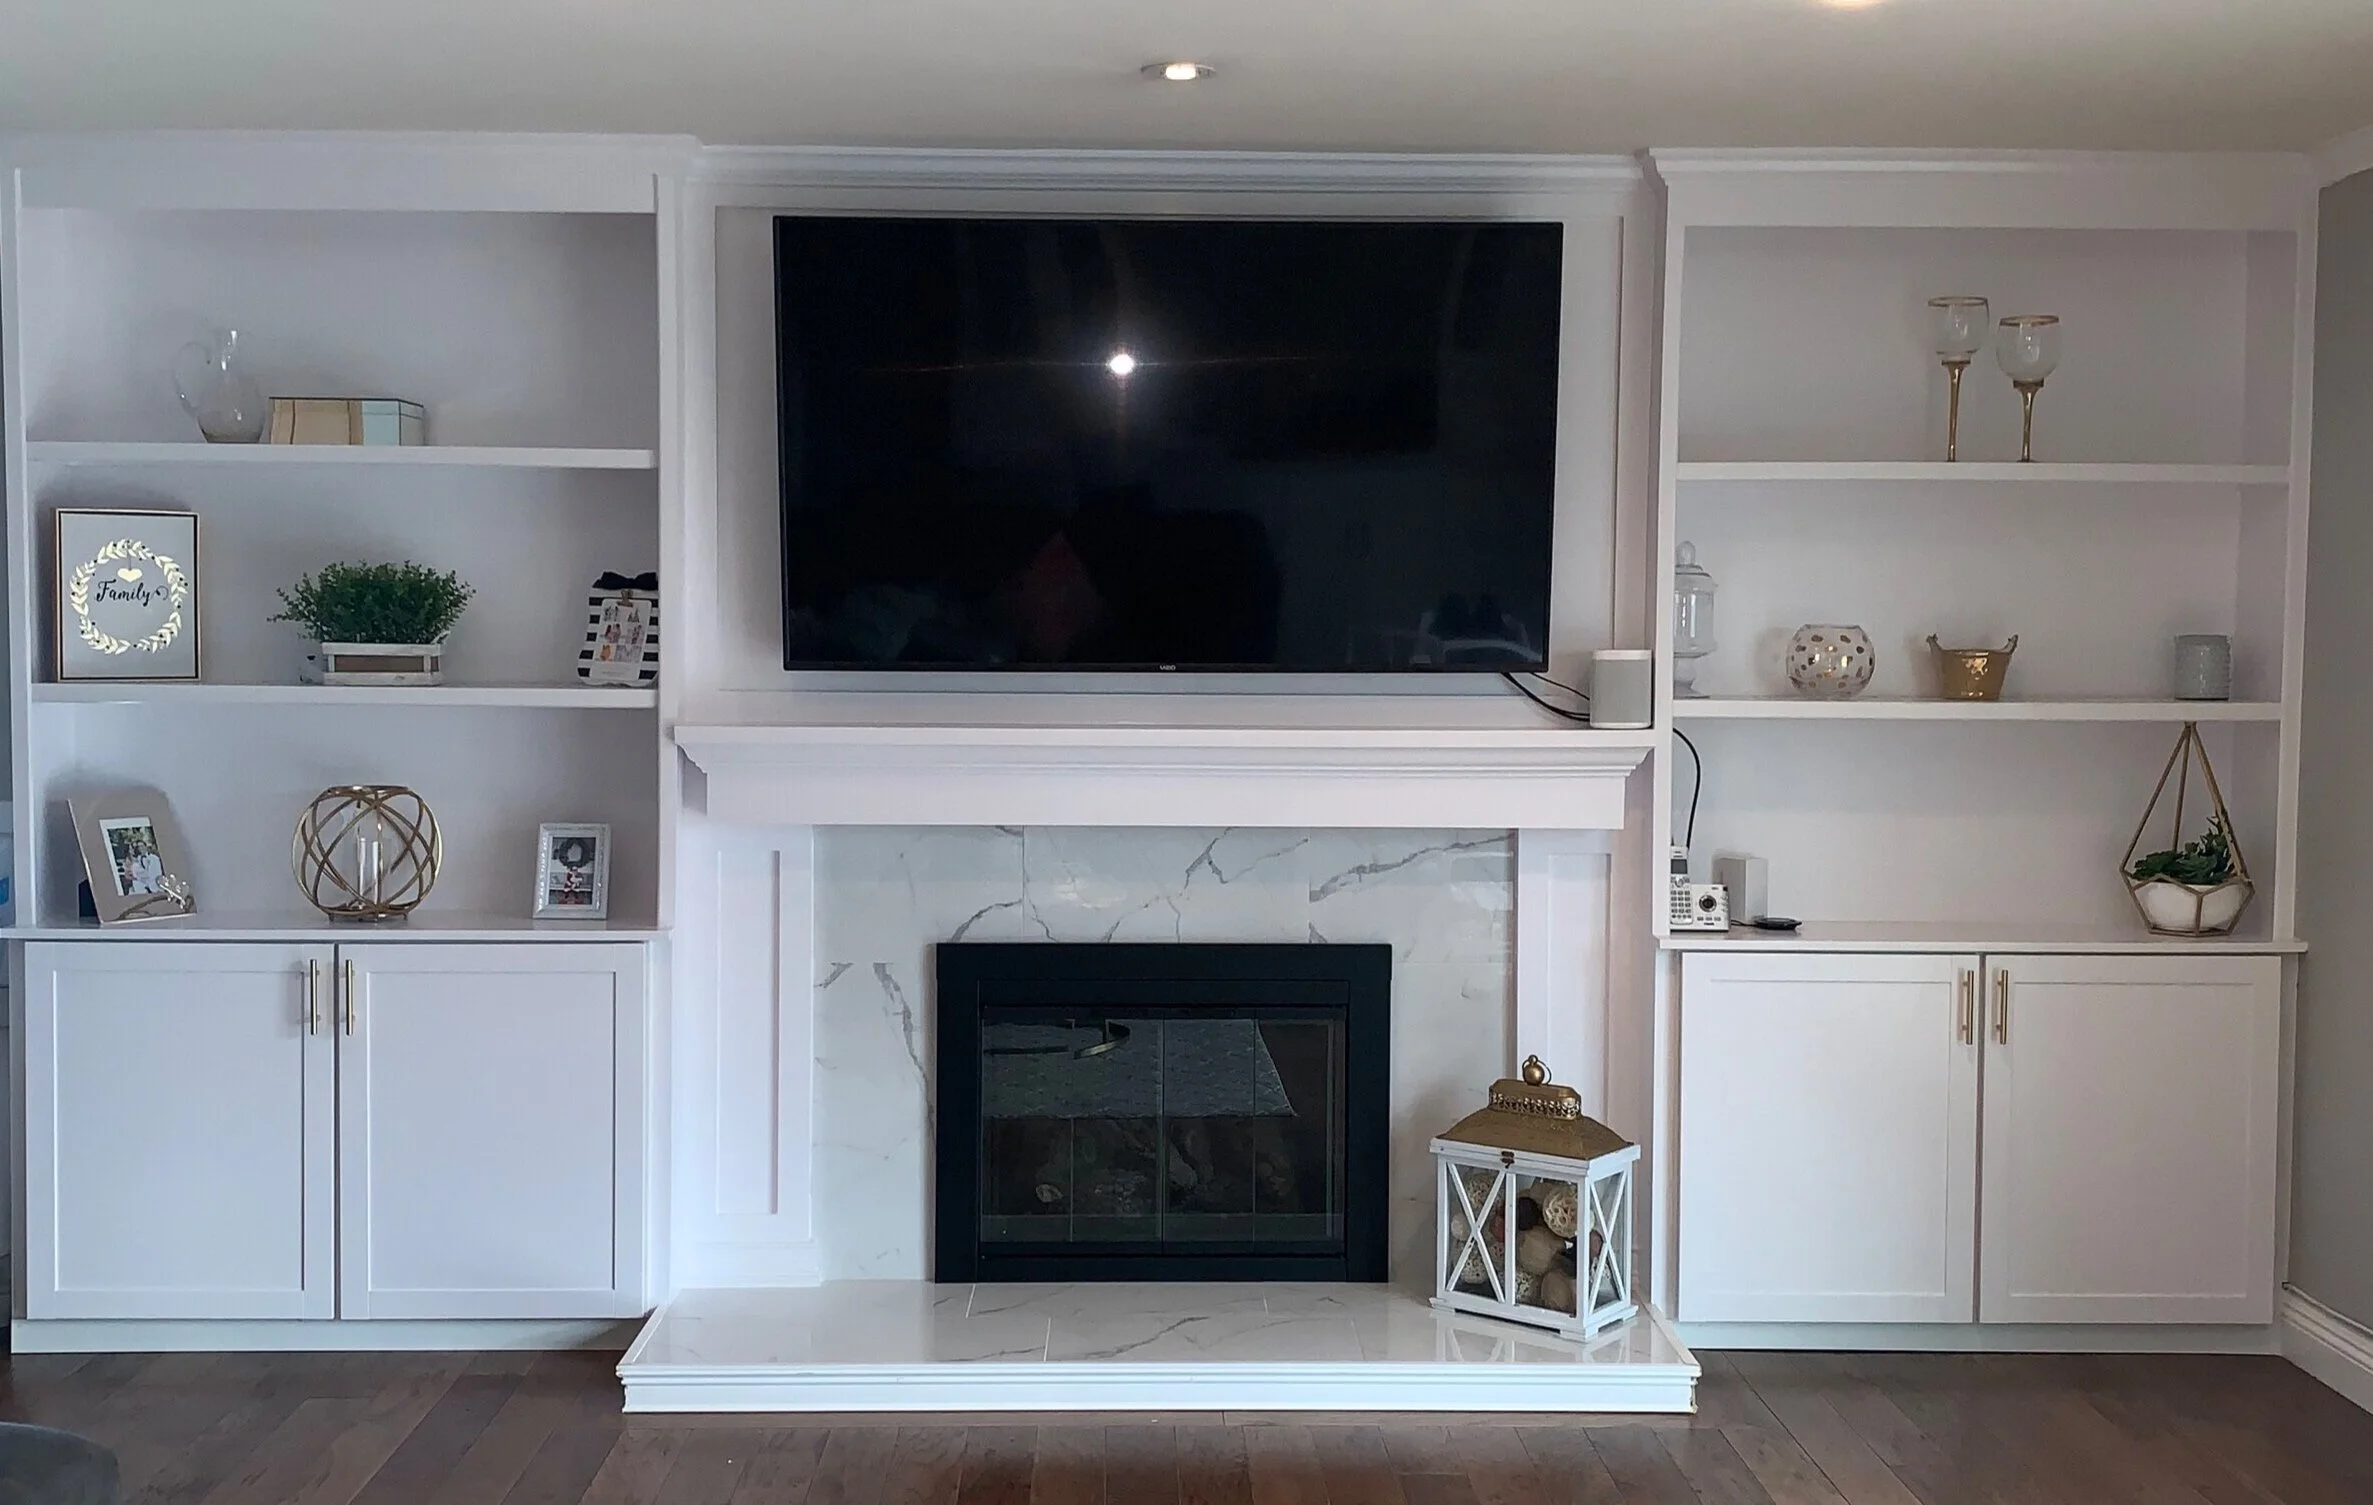
DIY Fireplace Surround and Built-Ins
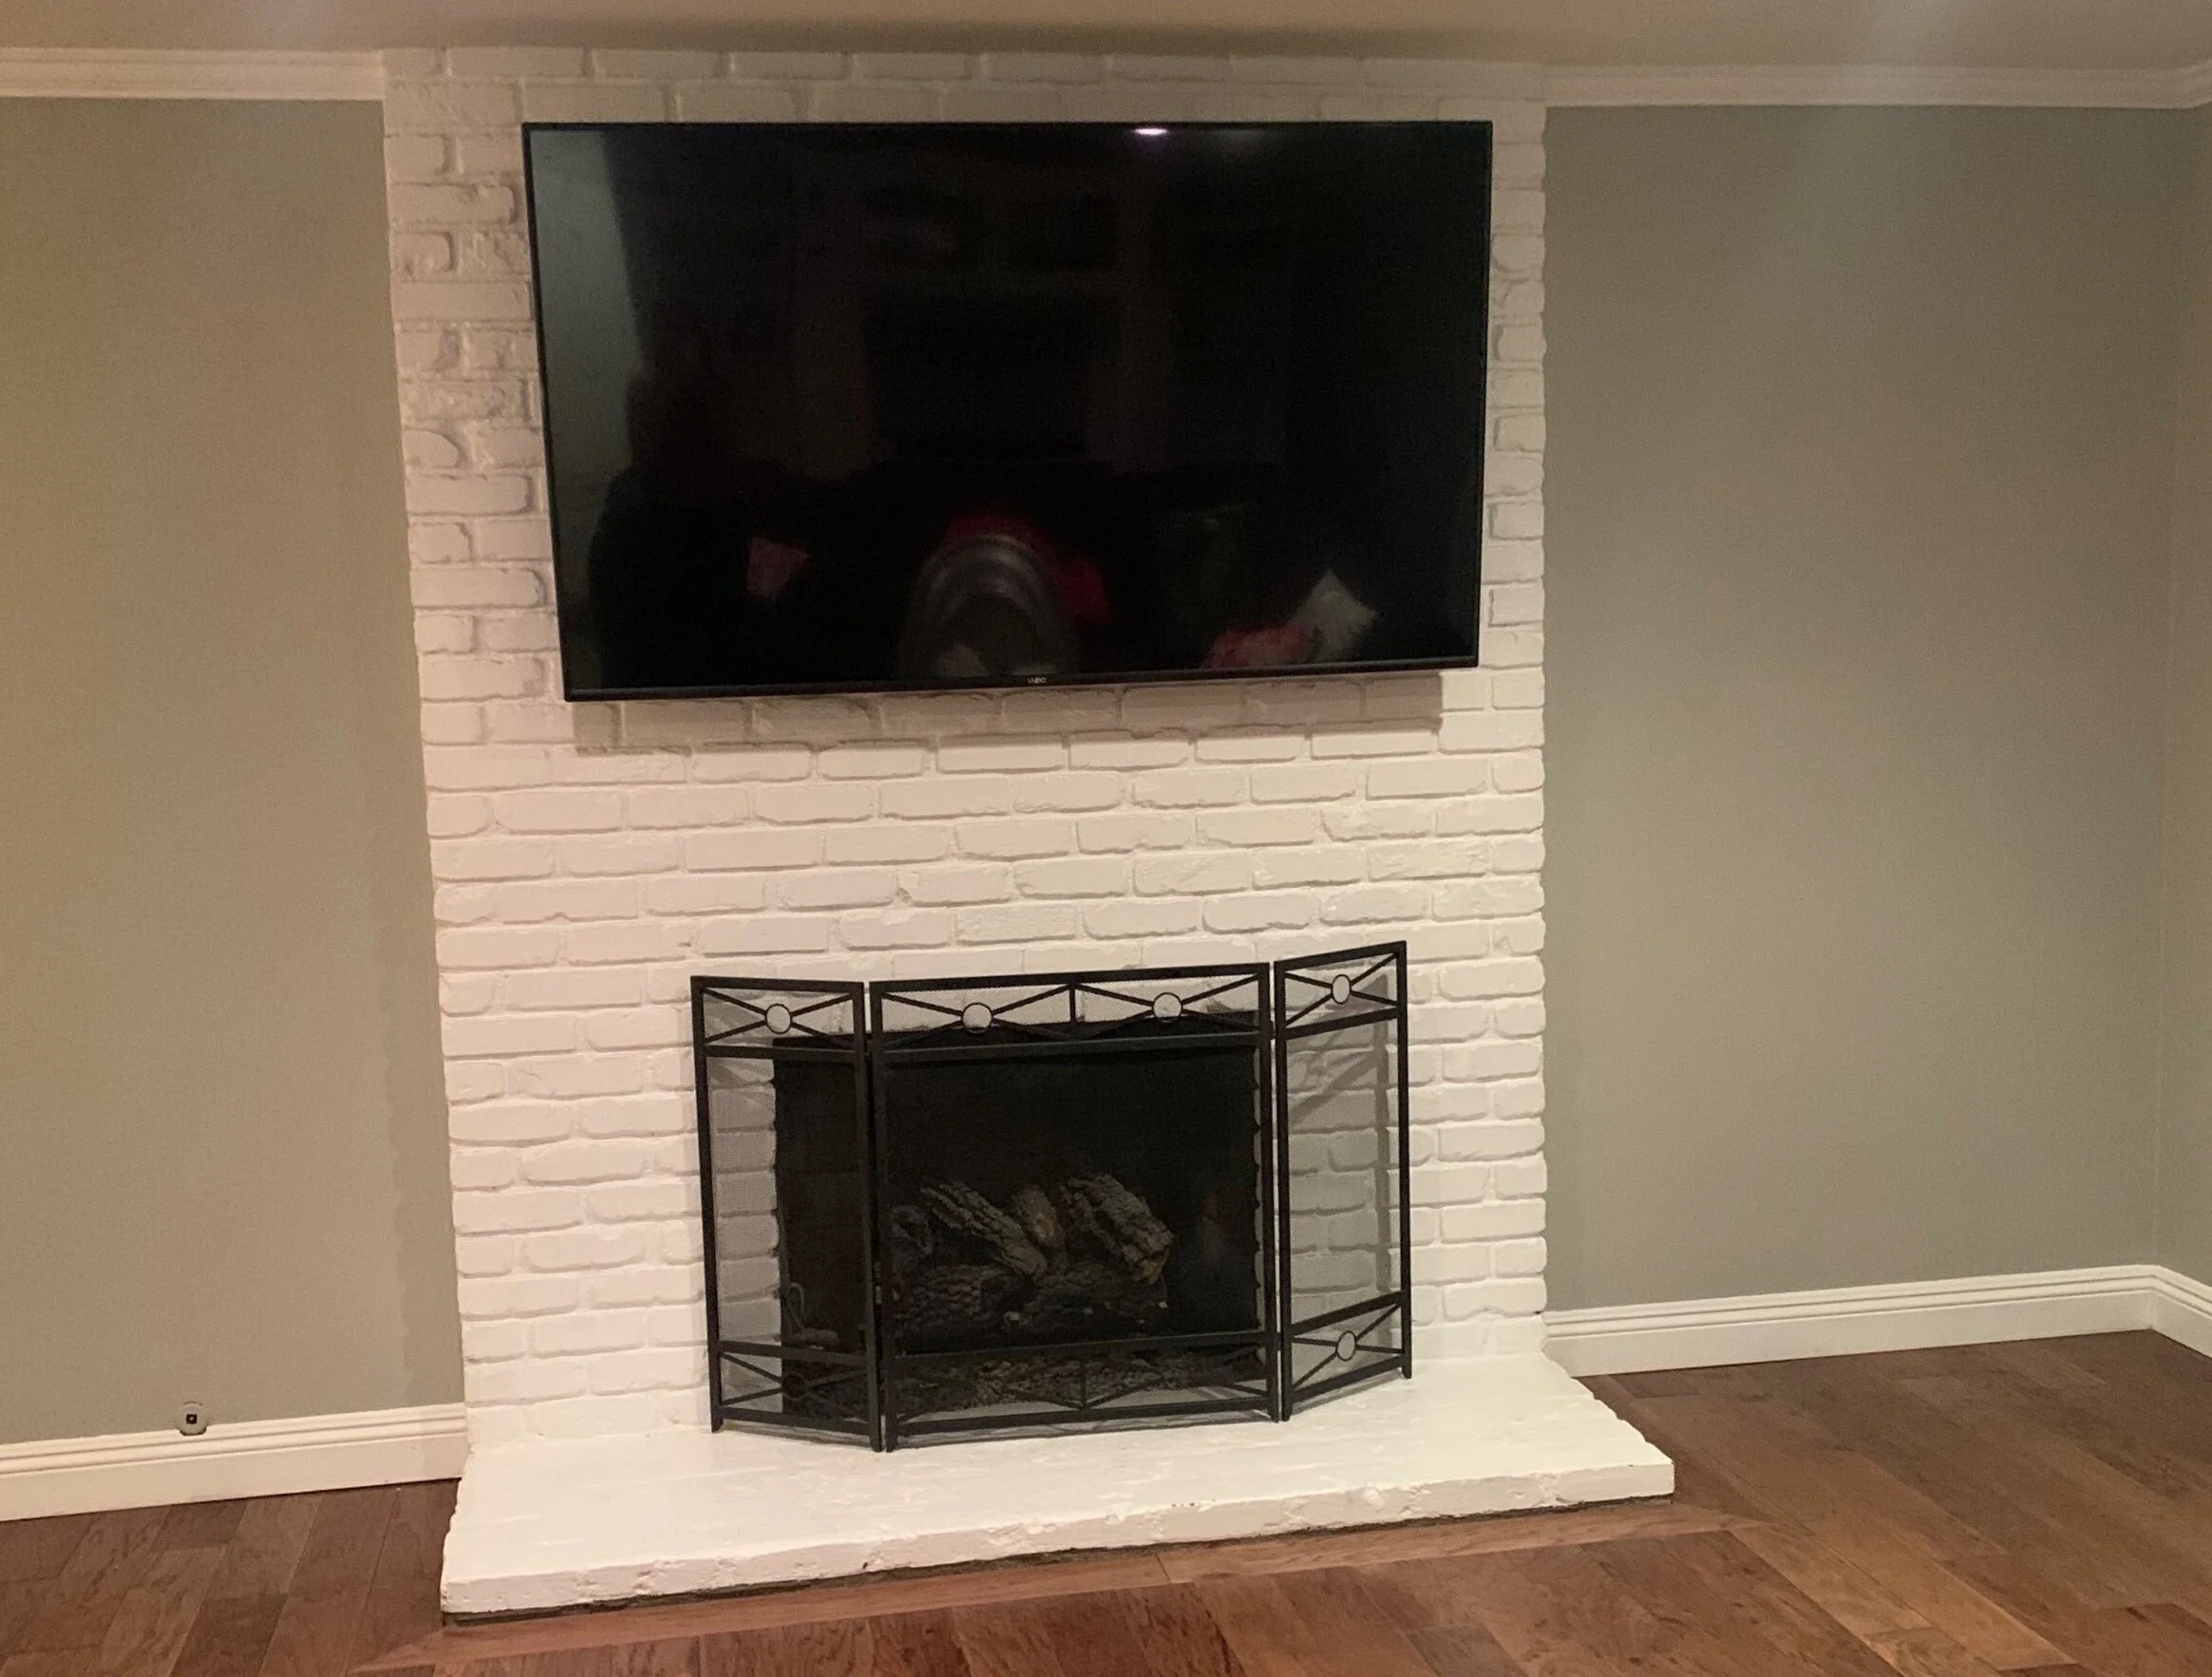
A few months ago we finally tackled our fireplace surround and built-ins! I knew from the day we purchased this house that this was a project I would want to do! I grew up watching my dad tackle projects like this and I watched him build an entertainment center so I knew it could be done! I spent hours searching Pinterest reading tutorials on how people built these, how to tile and how to build a mantle. But even with all that research we still got stuck on a few spots! I’ll walk you through what we did but first I want to show you what it looked like before we did anything! The entire fireplace was brick and we didn’t have a mantle. My husband had purchased the biggest TV possible and we had mounted it to the brick already! So we decided to leave the mount up and build around it! Here is the before shot:
The first thing we did was tile the hearth and opening around the fireplace. We found a porcelain tile from Lowes that we loved. Thankfully it required very minimal cutting! We laid it out on the floor to decide which tiles we wanted and how to order them. Then we cut them to fit the space we wanted to fill and used a mortar to adhere them to the existing brick.
We then cut a piece of 3/4 inch plywood to go around the tile and cover the rest of the brick. This was going to become our mantle and surround. We used concrete screws and screwed it directly into the brick. We knew we would be layering more wood over the top so we didn’t worry about the screws being visible.
Next we boxed in the hearth with decorative molding. We couldn’t find base molding that was the right width with a design we liked so we actually used a window casing and it worked perfectly!
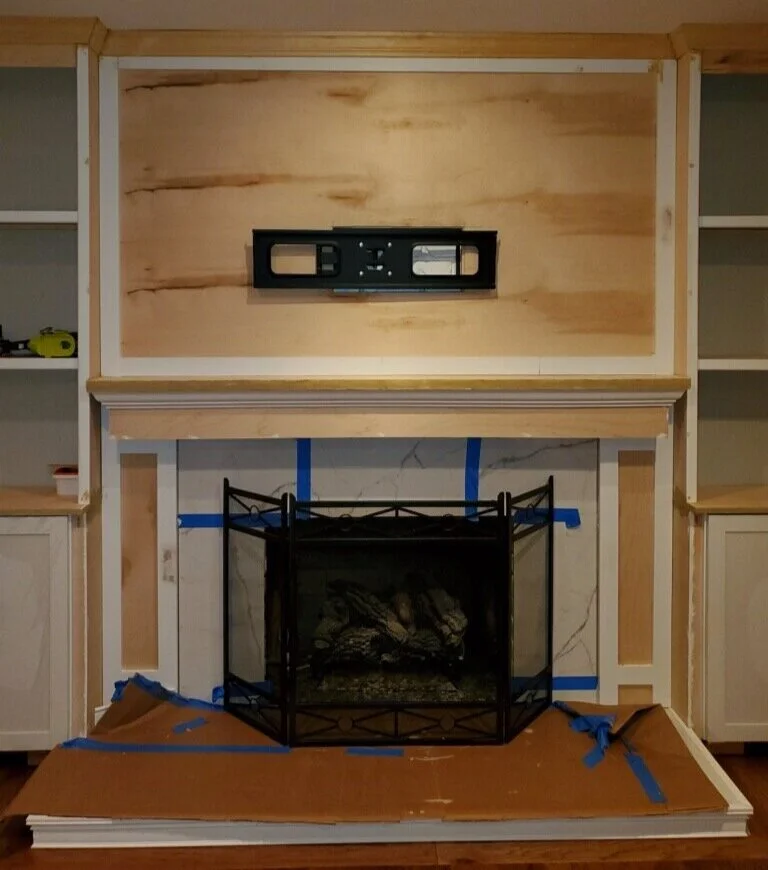
Next we grouted all of the tile. Looking back I wish we had waited to do this because some of the grout got dirty while we worked on the rest of the project! We used blue paint to cover the grout while we worked and you’ll see that in future pictures.

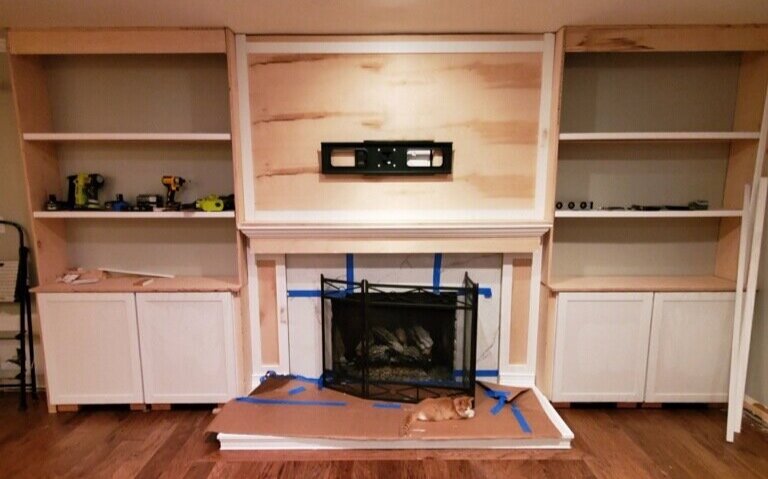
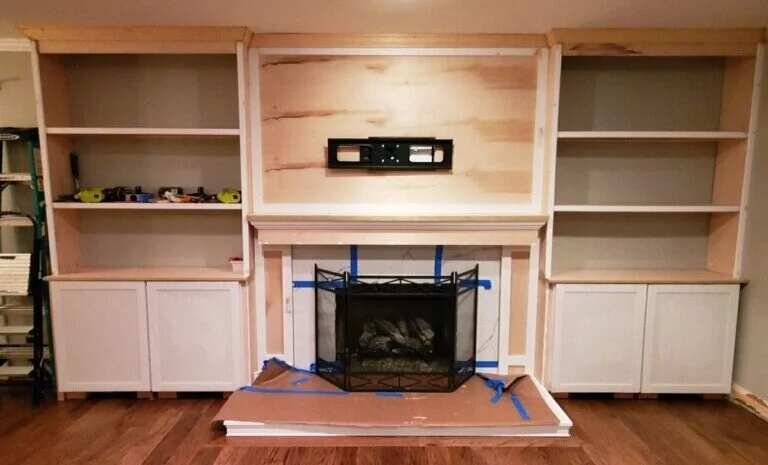
Next we used another sheet of 3/4 inch plywood to cover the remaining brick above. We had to cut a hole in the right spot for the TV mount and we had some problems getting the screws to hold to the brick behind it! But after multiple tries and maneuvering, it stuck!
Our next step was to add the cabinets we wanted on either side of the fireplace. We used upper kitchen cabinets instead of base cabinets because the depth is narrower! Since they are meant to be used as uppers, we had to create a base for them. You can see in the picture below they are sitting on 4x4 blocks. You can also see that we left space in between the cabinets and fireplace because we wanted to center the cabinets on the wall.


Our next step was building the shelves that sat on top of the cabinets. We used 3/4 inch plywood to create a counter on top of the cabinets and the shelves. We then used thin strips of wood to create a ledge for each shelf to sit on top of and the shelves were nailed into those strips.
One of the hardest steps we had was connecting the cabinets to the fireplace surround. You can see in the picture above that there is a gap that needs to be filled. Theoretically this seamed like it would be simple, create 2 sides of a box and nail it in. But it was much easier said than done since we were using thin plywood. I can’t detail out what we did because honestly my husband worked some magic to make it all work and I don’t know how to explain what he did!

Next we decided where to hang the mantle. Because our TV takes up a large space, we had to place the mantle a little low and we knew that there would not be much space to put decor on top of it without it blocking the TV. Before hanging the mantle we covered the plywood on the sides of the tile with smooth, 1/4 inch plywood. This covered the screws and gave it a smoother finish. We used 3/4 inch plywood for the mantle and attached it to blocks of wood to rest on. We then used very thin plywood to create a box below the mantle. We also attached those to the blocks of wood the mantle was sitting on. This was much easier said than done and it took us a few days to figure out how to create and attach this box!
We also added a strip of thin plywood to the top of the book shelves to add a more decorative look. We knew we would be adding crown molding on top of that, so we accounted for that in our measurements. We also wanted to create a thicker look for our shelves so we added a piece of 1.5 inch thick molding to the edge of each shelf as well as to the sides of the bookshelf.
Our next step was to create the shaker style details on the wood posts and frame in the back of the TV. We used molding that we bought in the right depth and width so all we had to do was cut the length and nail it in! We also used the same case molding that is on the bottom of the hearth as a baseboard piece on each of the pillars. We mitered it so that the corners were clean and made it appear to have more depth than it did.
We then added crown molding to the mantle to give it a more decorative look. We also added crown molding at the top along the entire unit to give it a more finished look and help it connect to the crown molding we had in the rest of the house.
After this we needed to wood fill, caulk, sand and paint! We used a TON of woodpile because I wanted to smooth out the edges of the wood. Then we painted the entire thing white, which took a few coats. After we painted we added the kick plate to the bottom of the cabinets and the hardware to each cabinet. I ordered the cabinet hardware from Discount Home Furnishings and scored a huge deal on it! It was less than half the price of the same cabinet pulls from other retailers. They come in various sizes and you can find them HERE.

I hope you enjoyed seeing how we upgraded our fireplace! We are so happy with how it turned out and are so glad we did it ourselves instead of spending thousands of dollars to have it built! Now on to the next project!