Fireplace Makeover
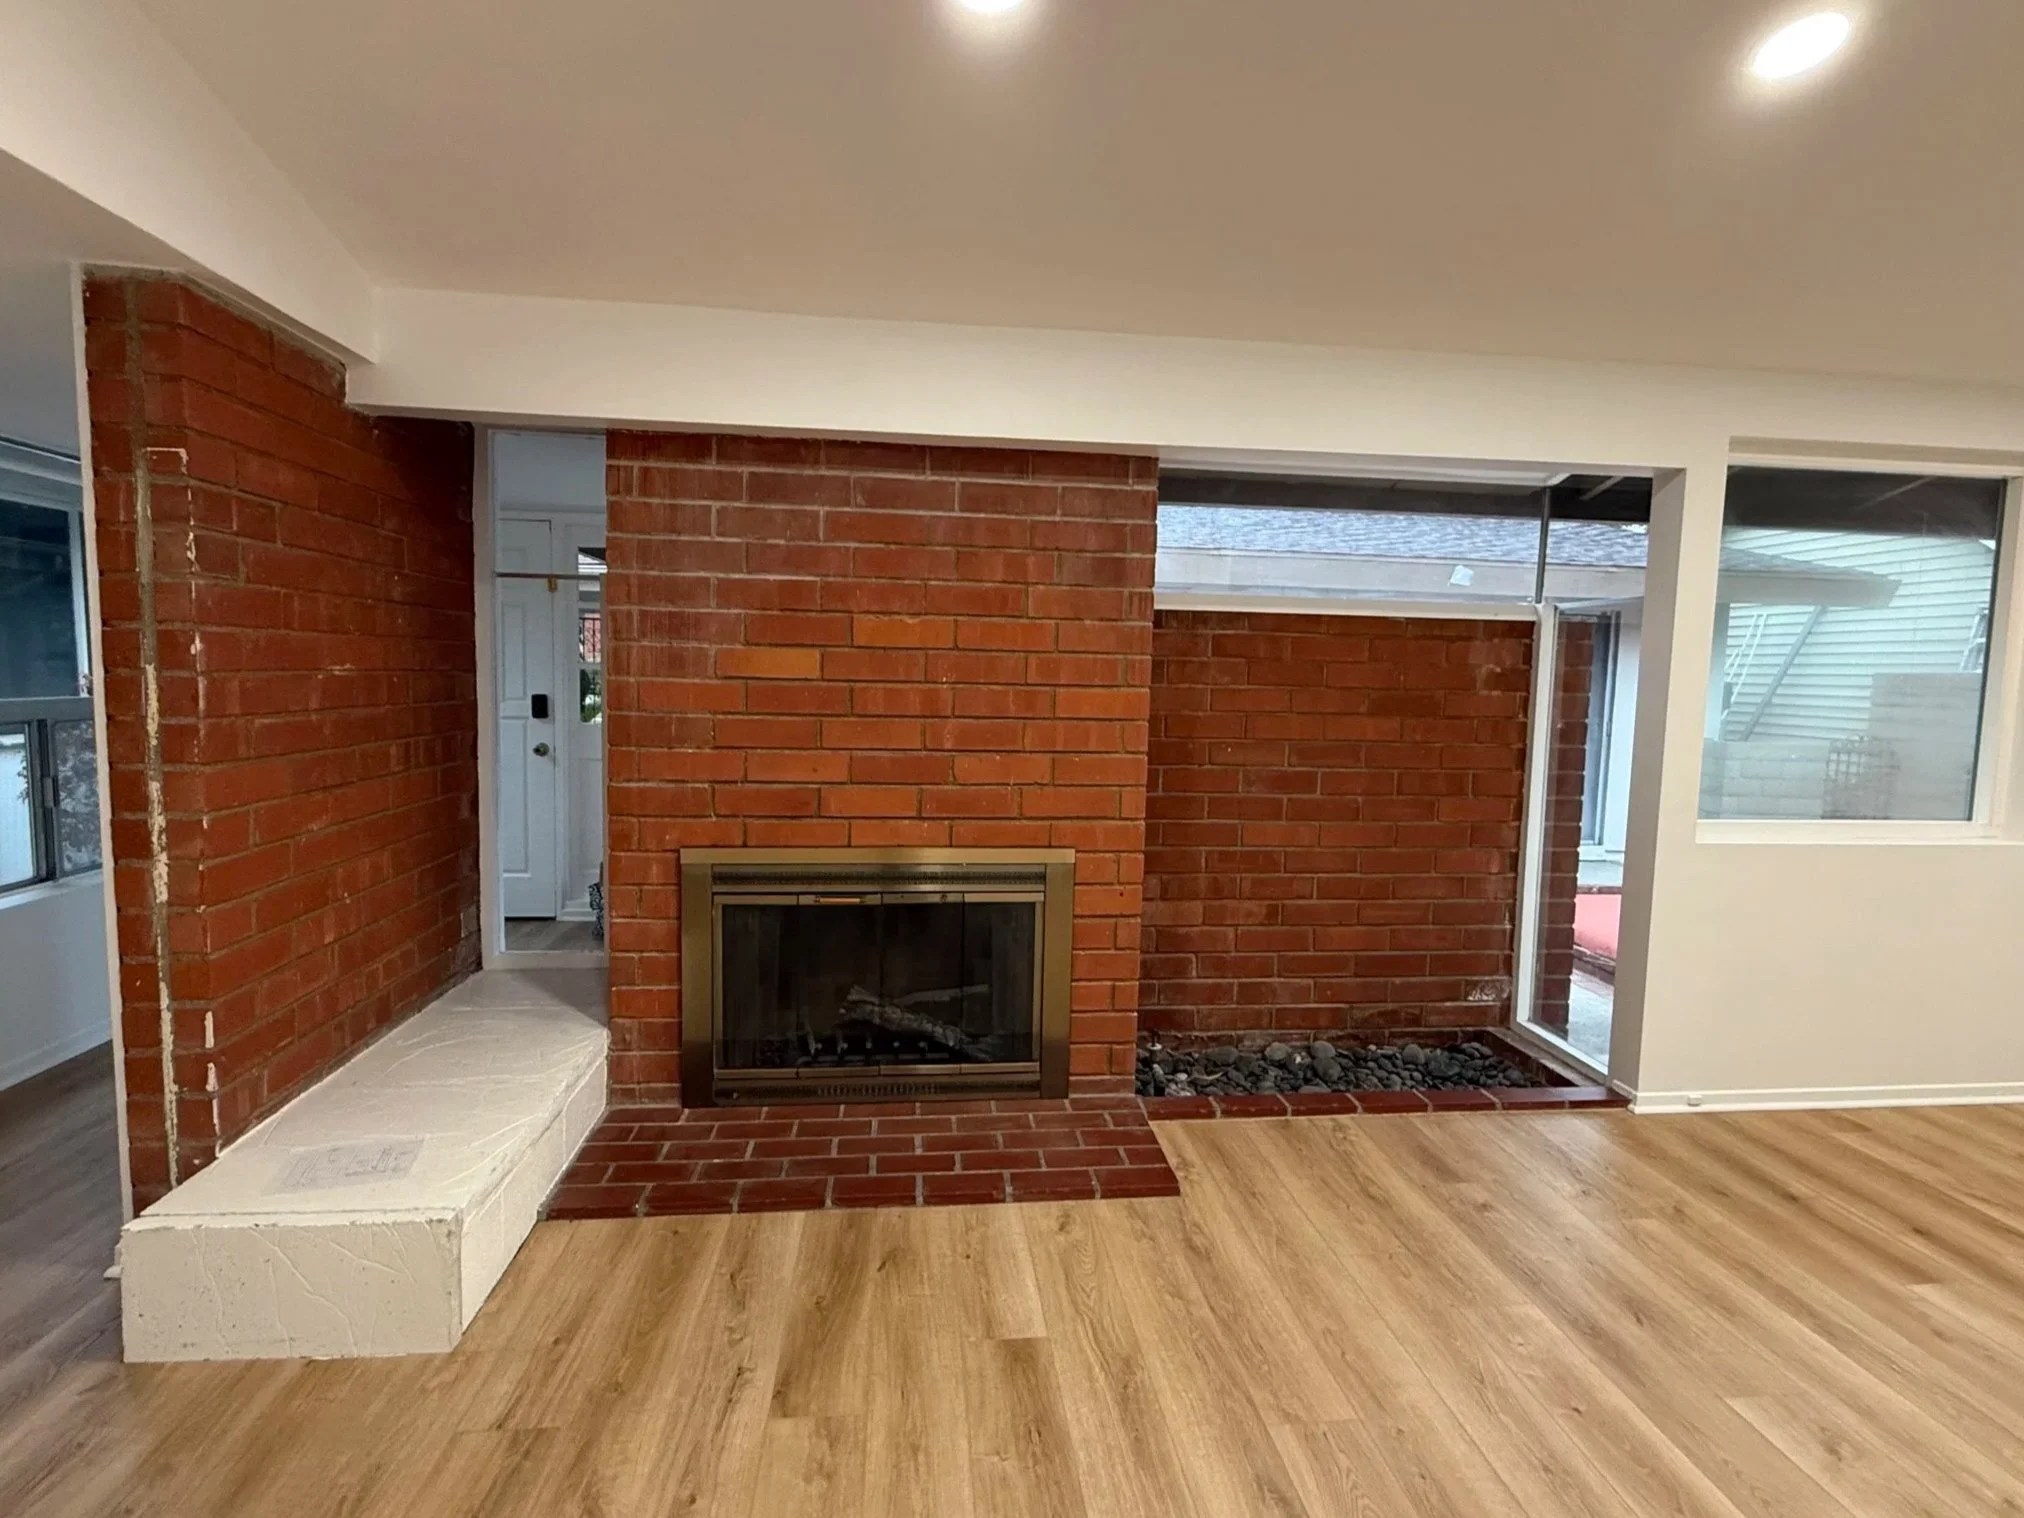
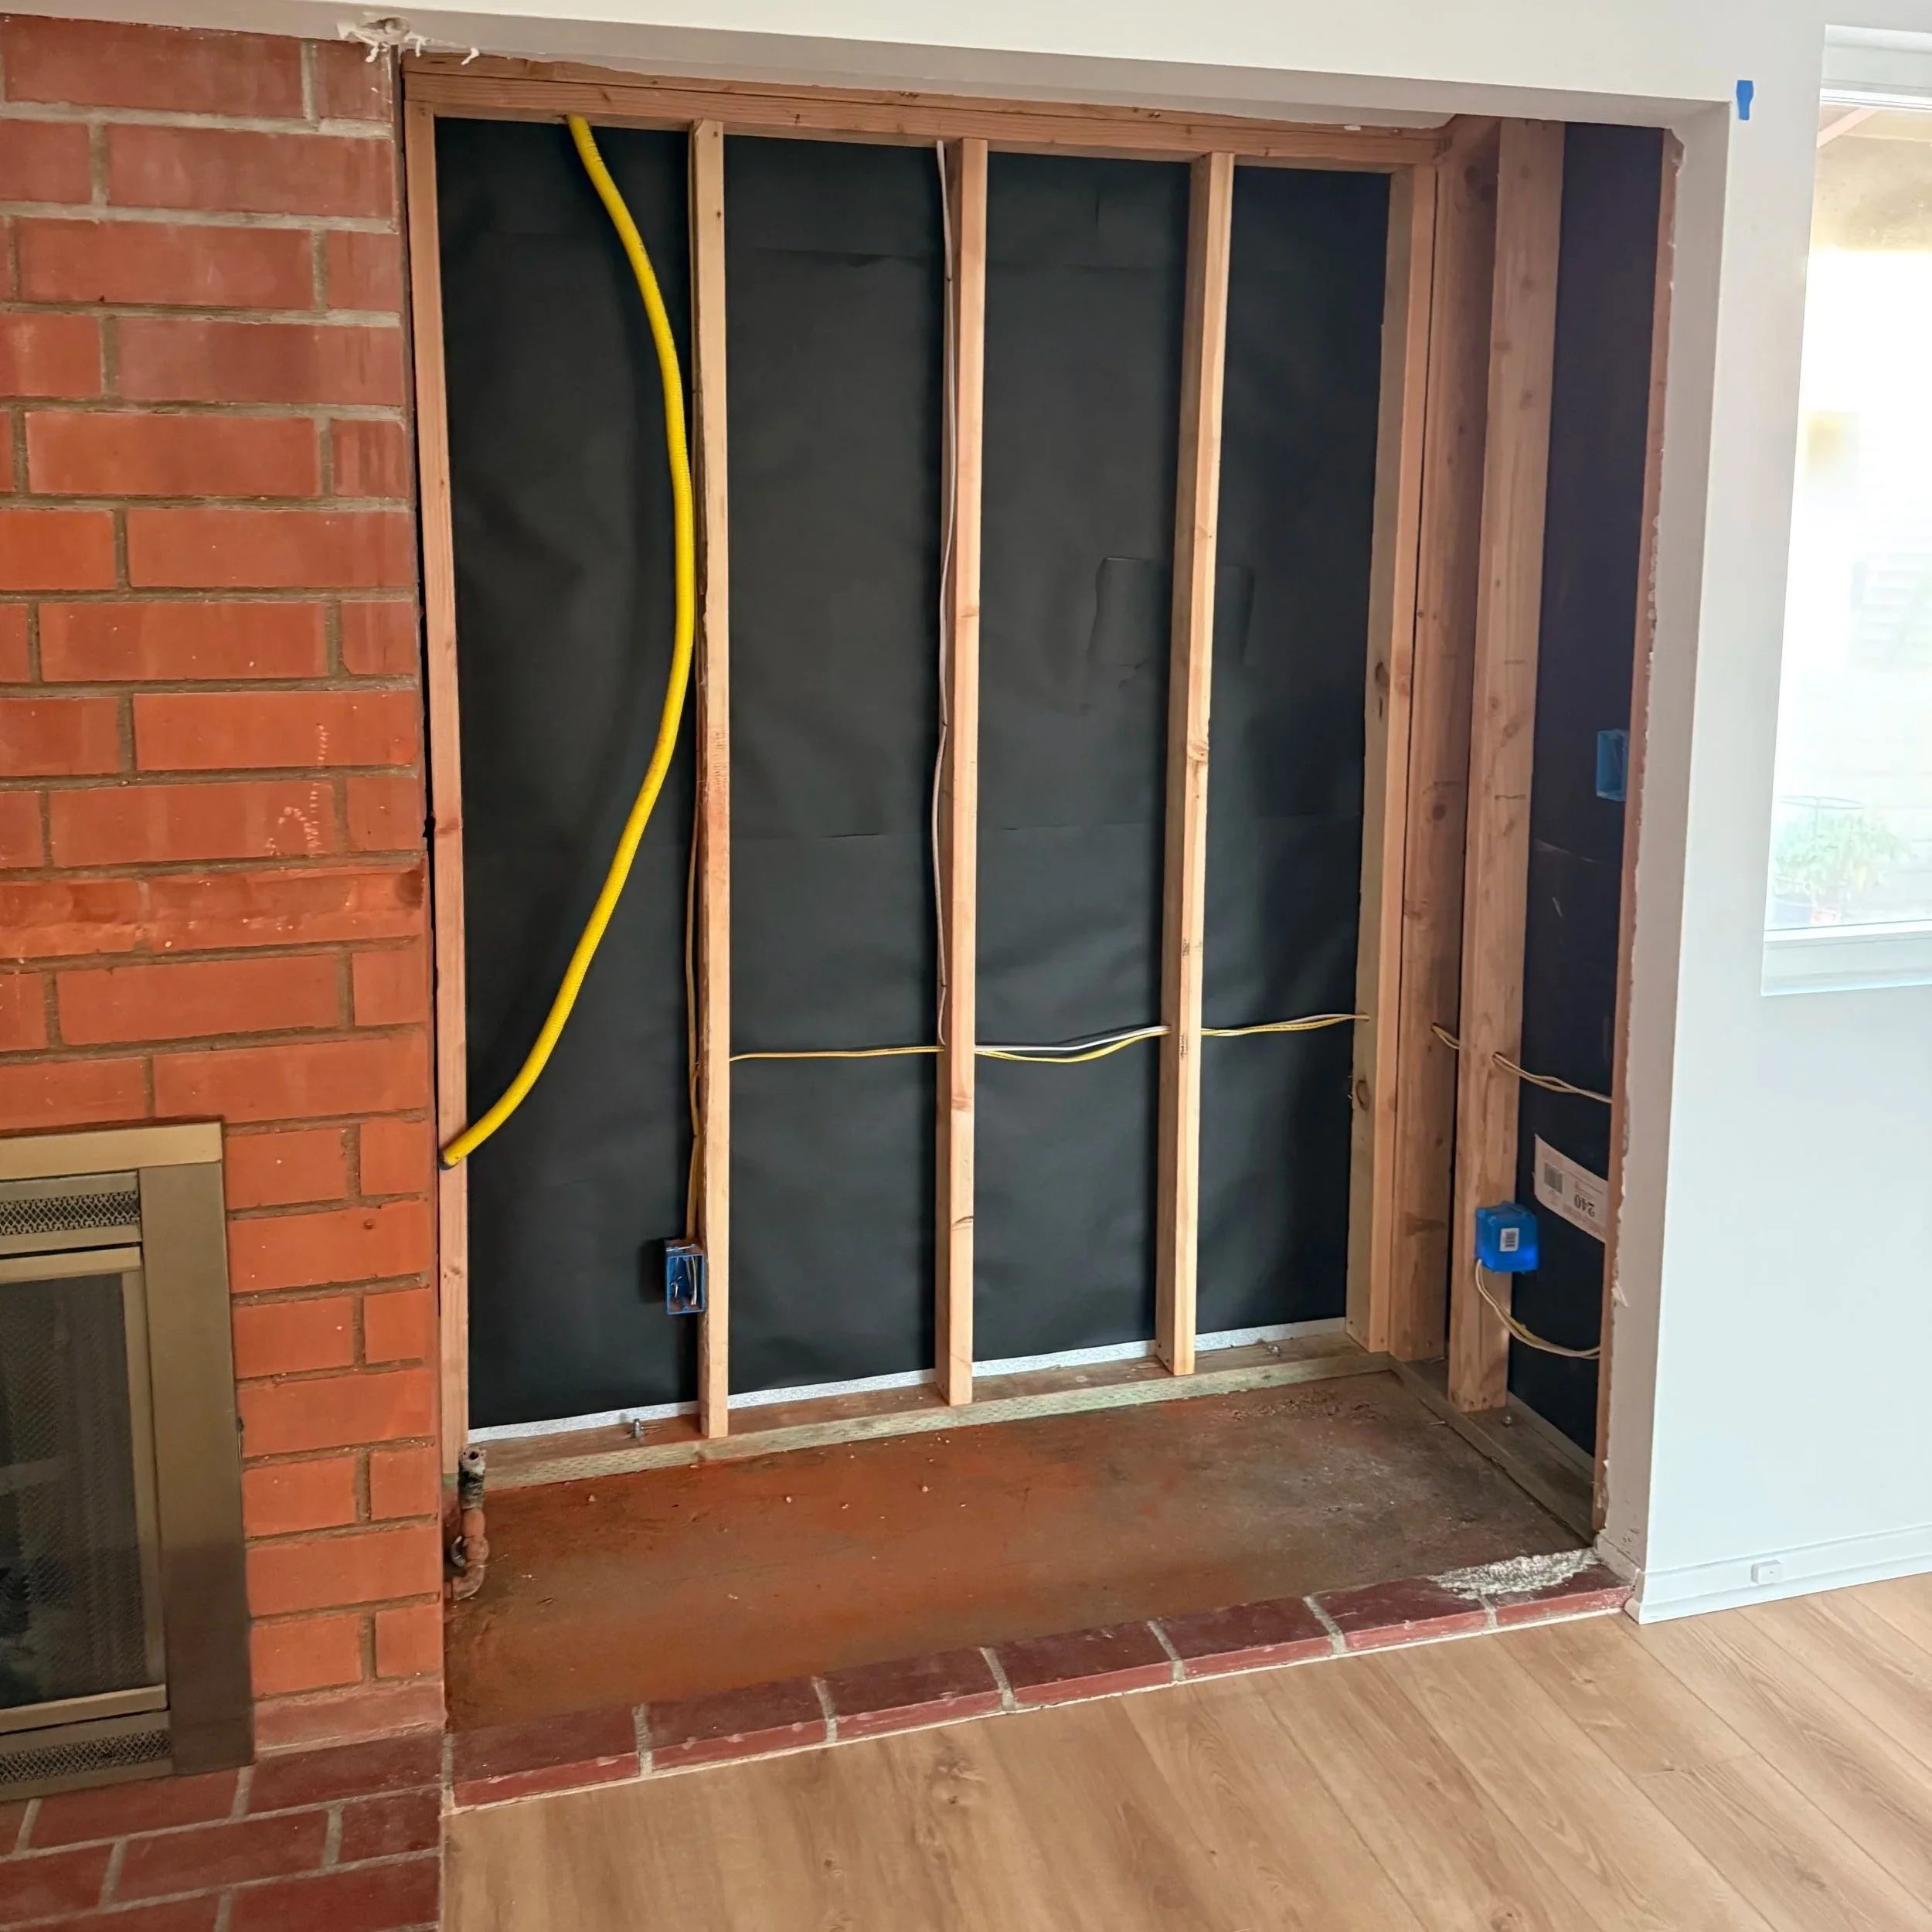
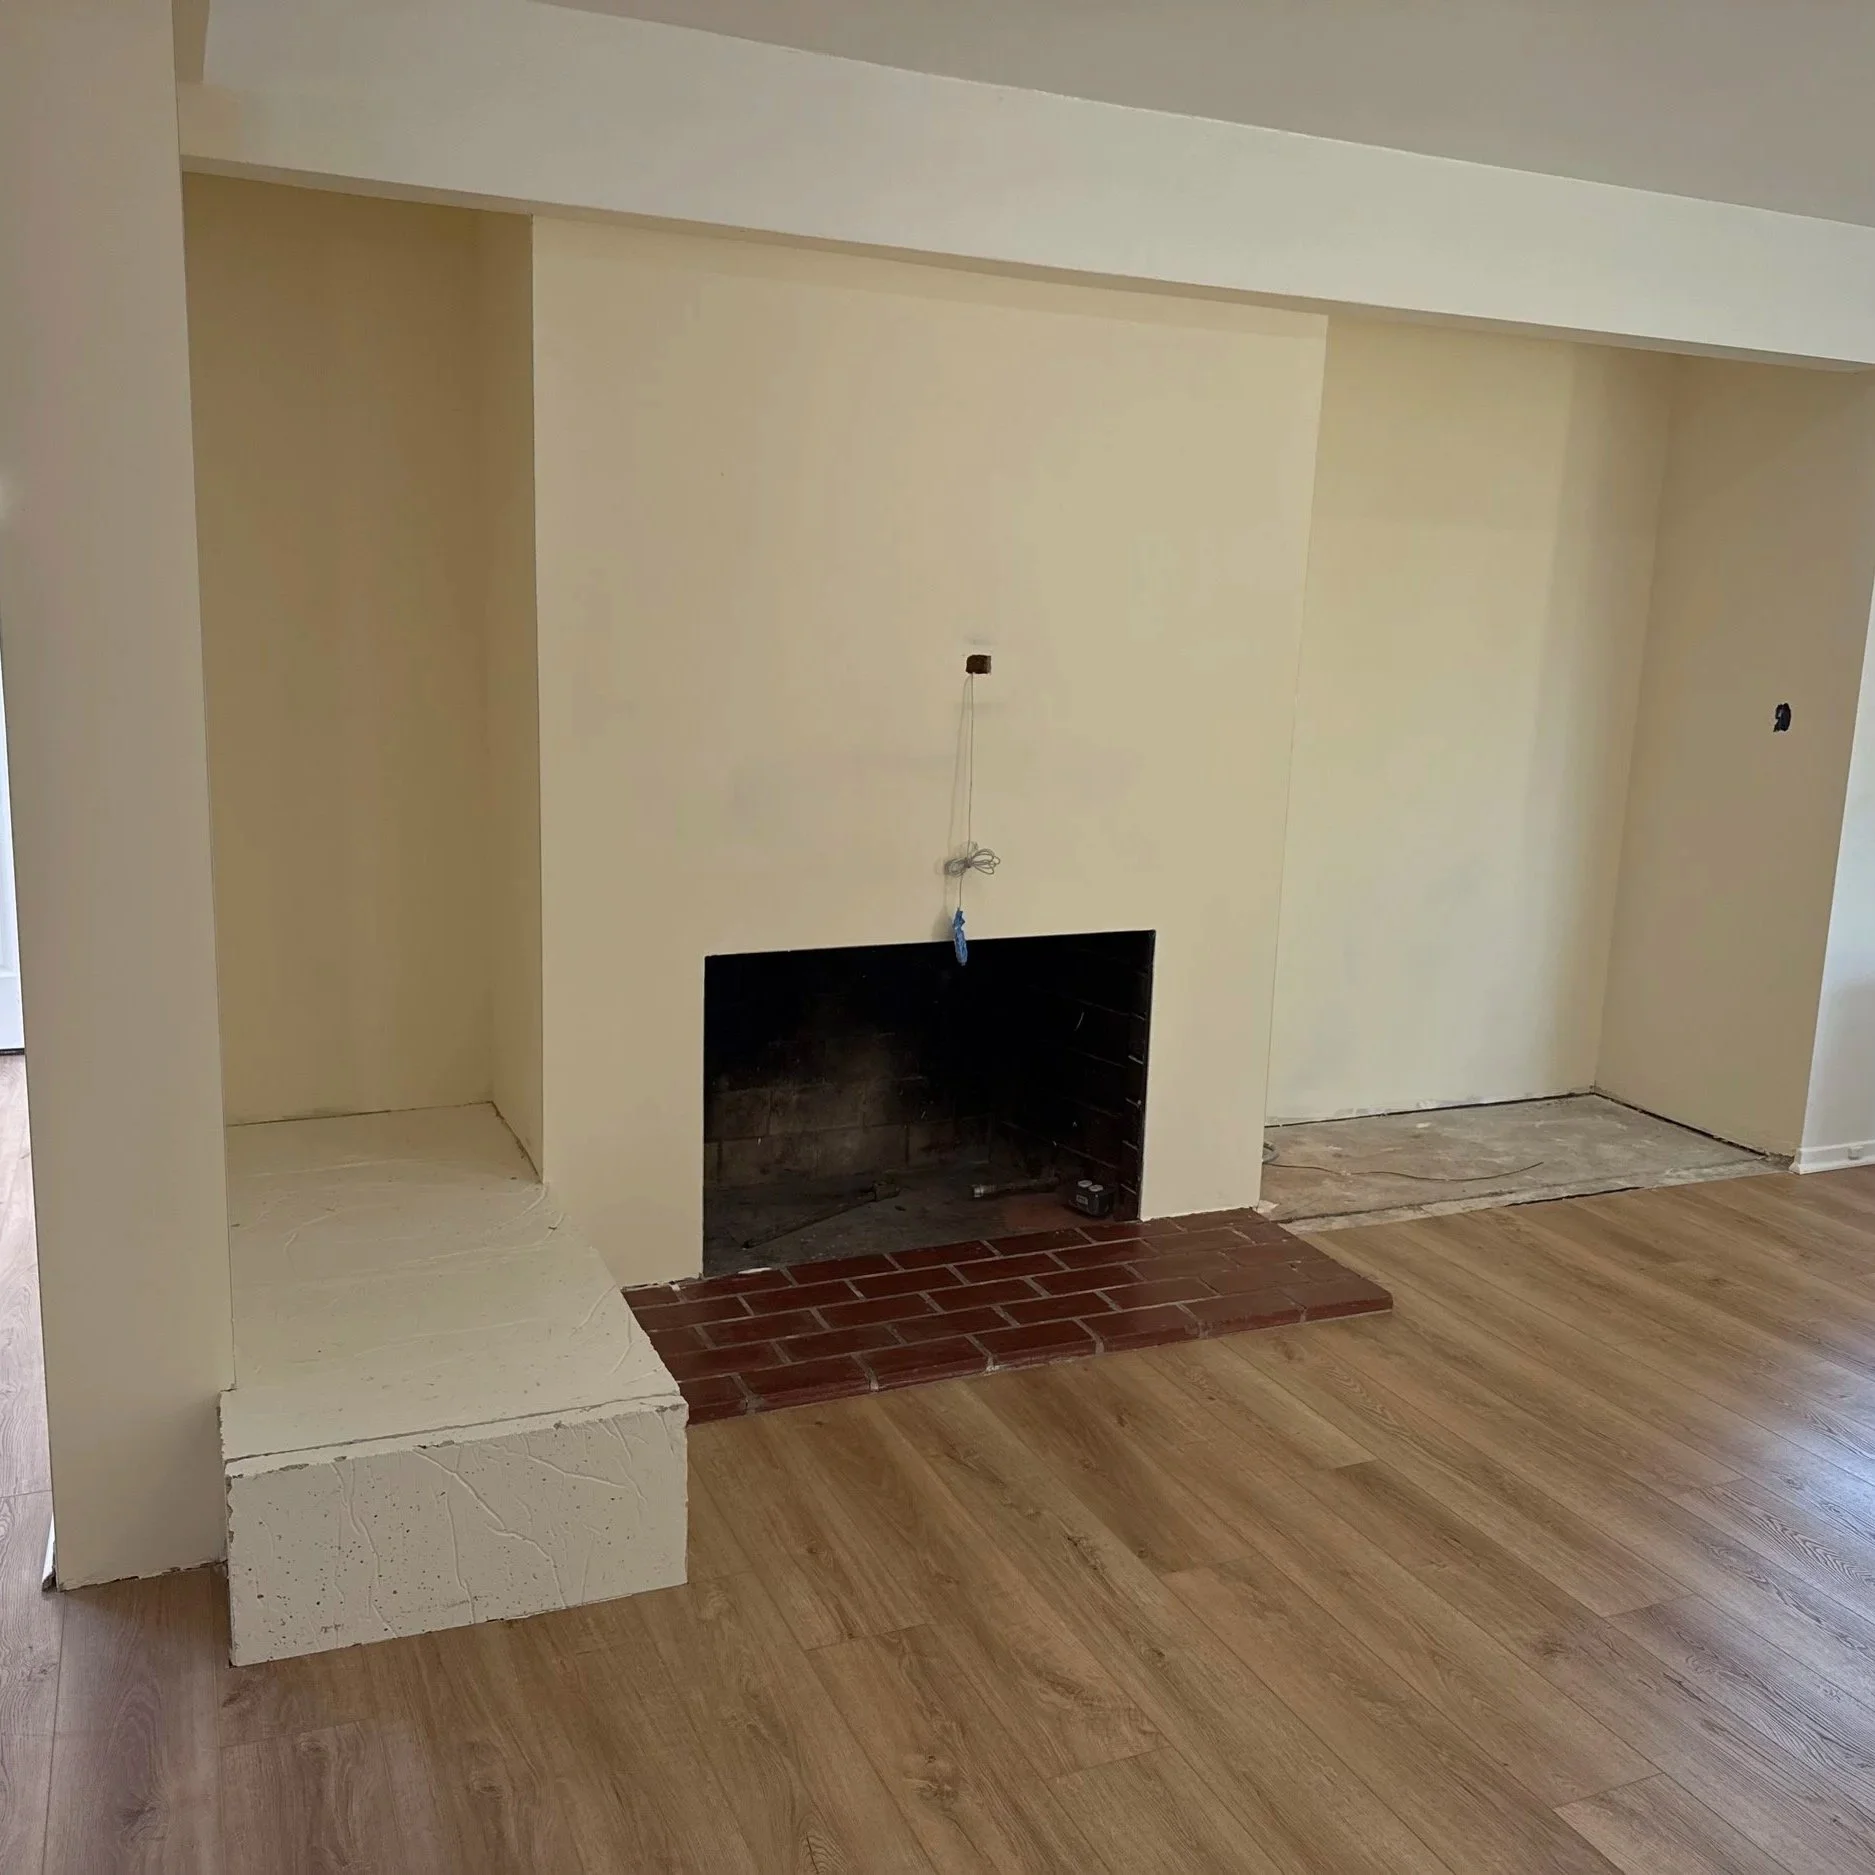
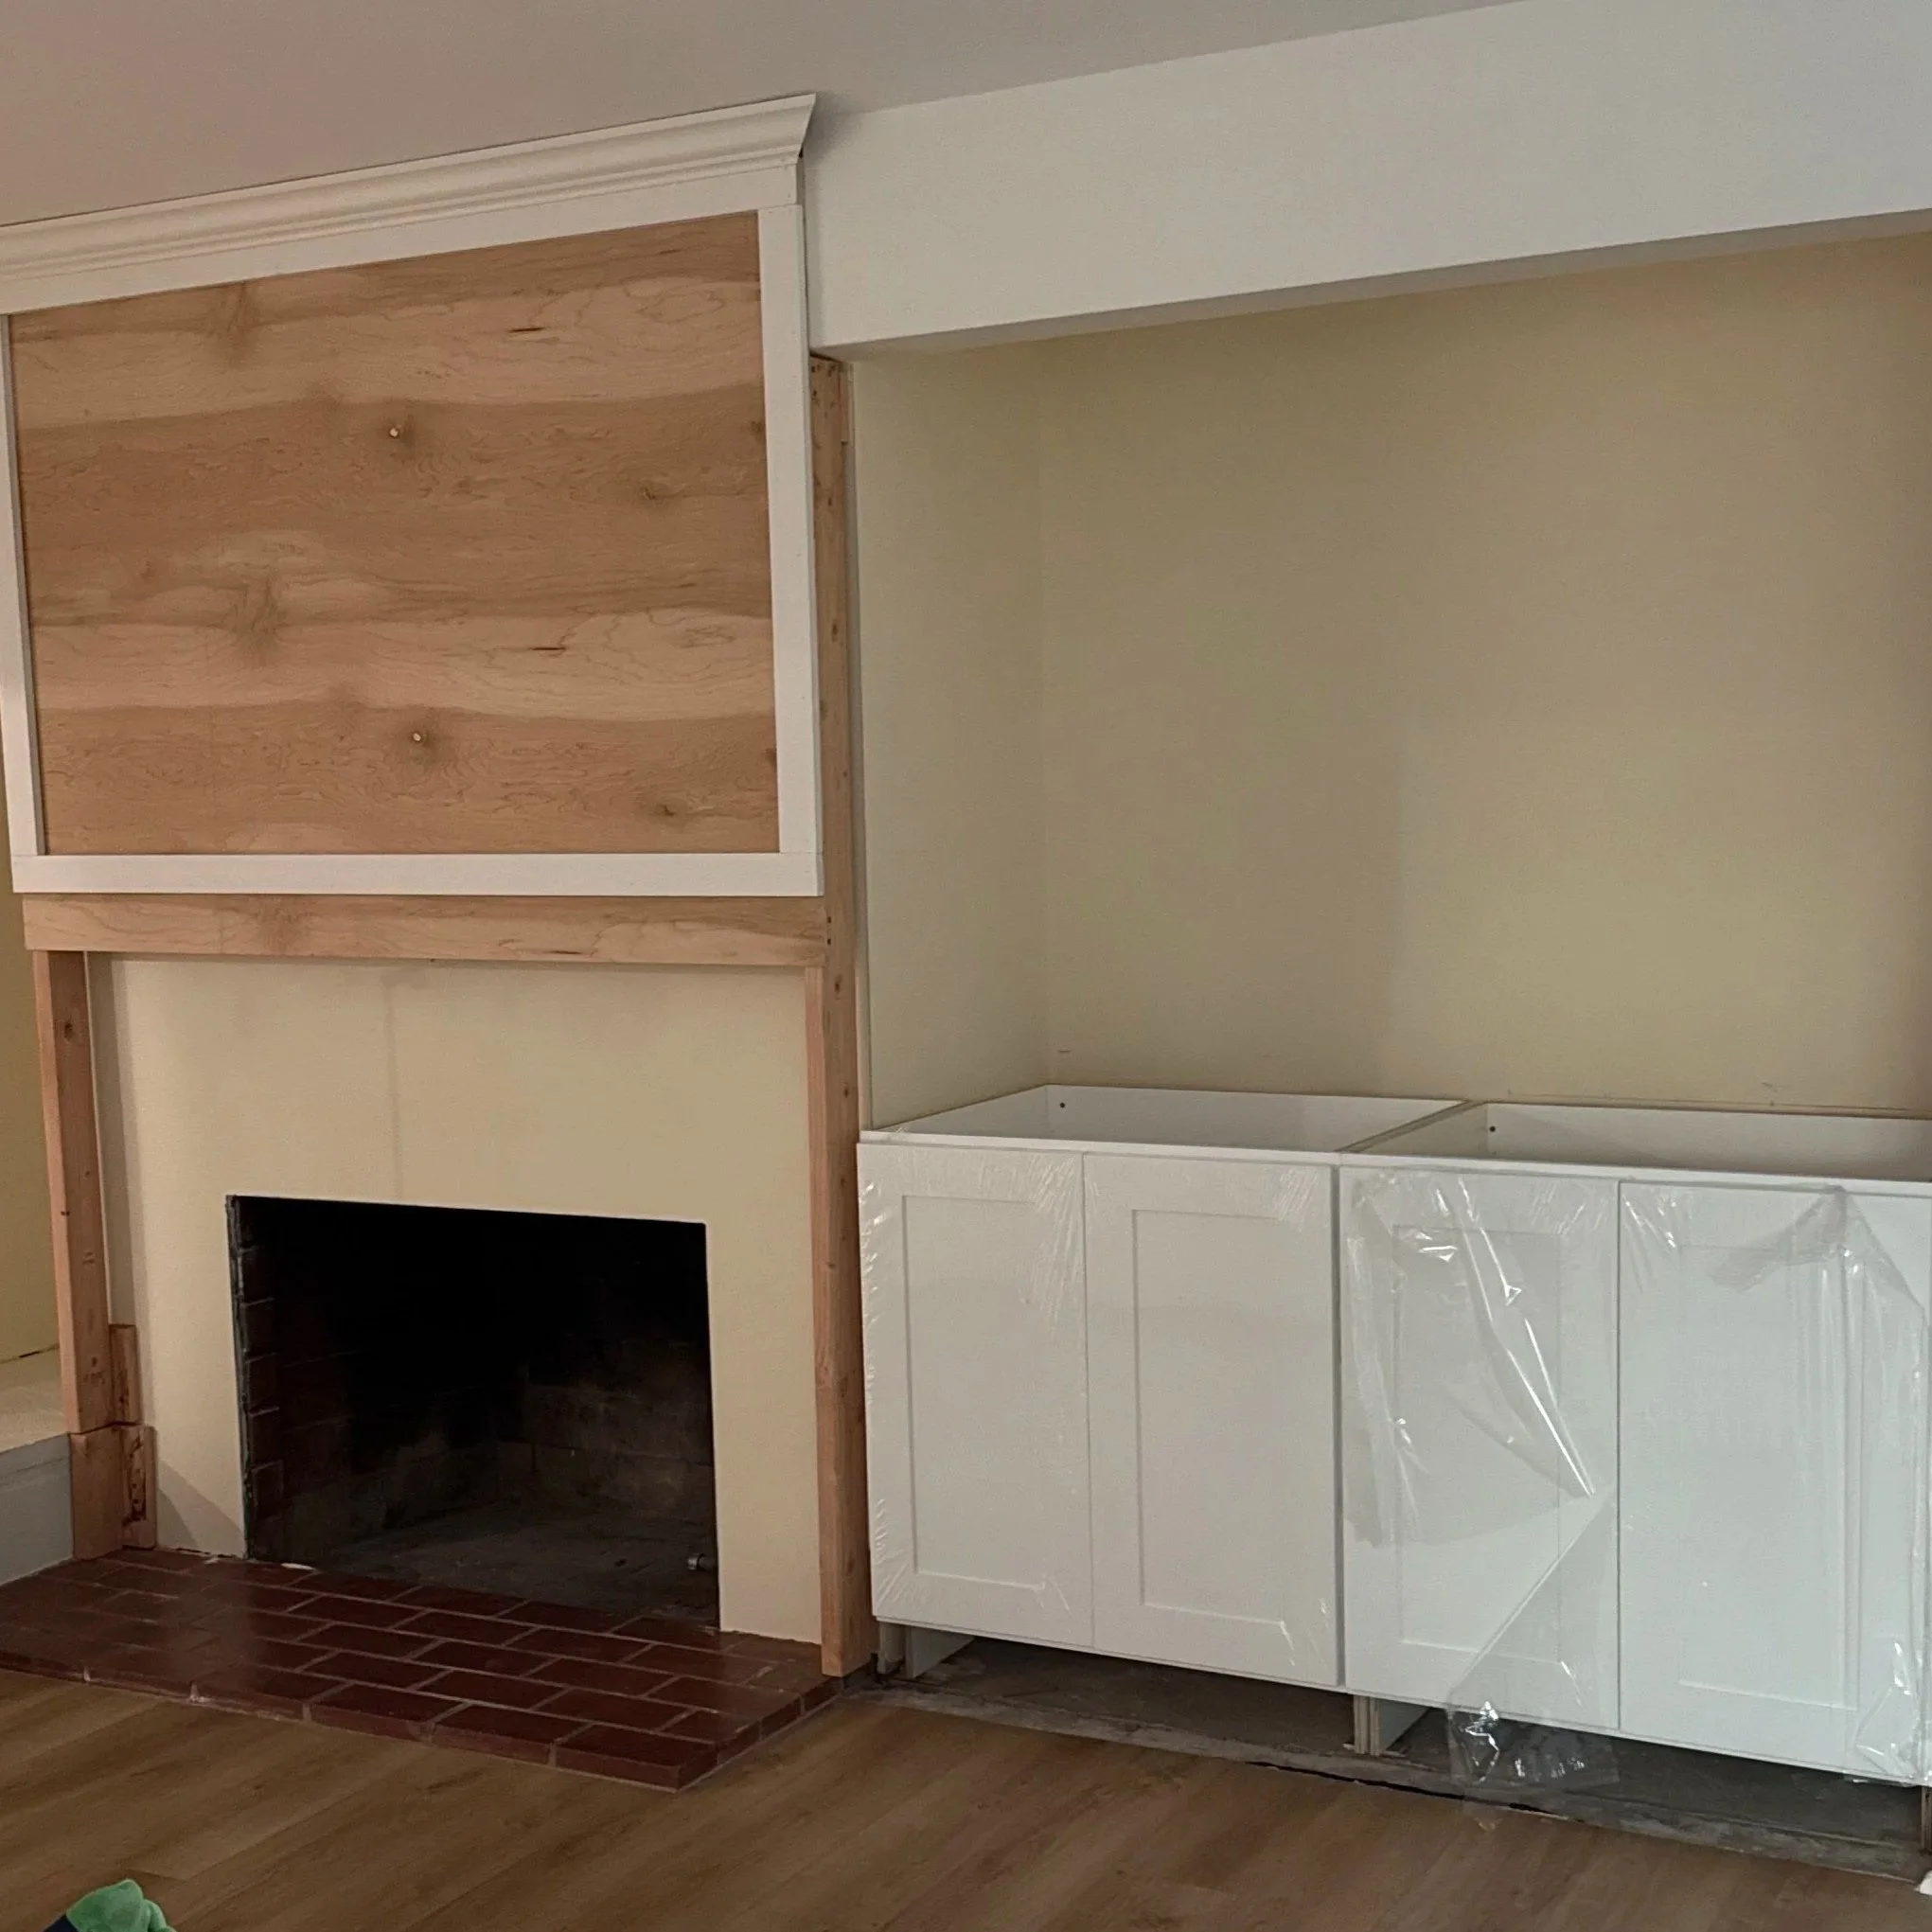
We recently moved houses and bought a fixer upper house that was original from the 1950s! The house needs a TON of work but one of the areas that was driving me the most crazy was our fireplace. I love having a fireplace but this one was so old it really wasn’t usable. The brick was cracking, there were these really weird single pane windows surrounding it that weren’t sealed properly and was making a great entry point for spiders… not to mention all the cold air that was creeping its way in as well! But one of the worst parts was the terrarium filled with gross rocks and dirt and the exposed gas access point sticking out of it! You can see the before pictures below.
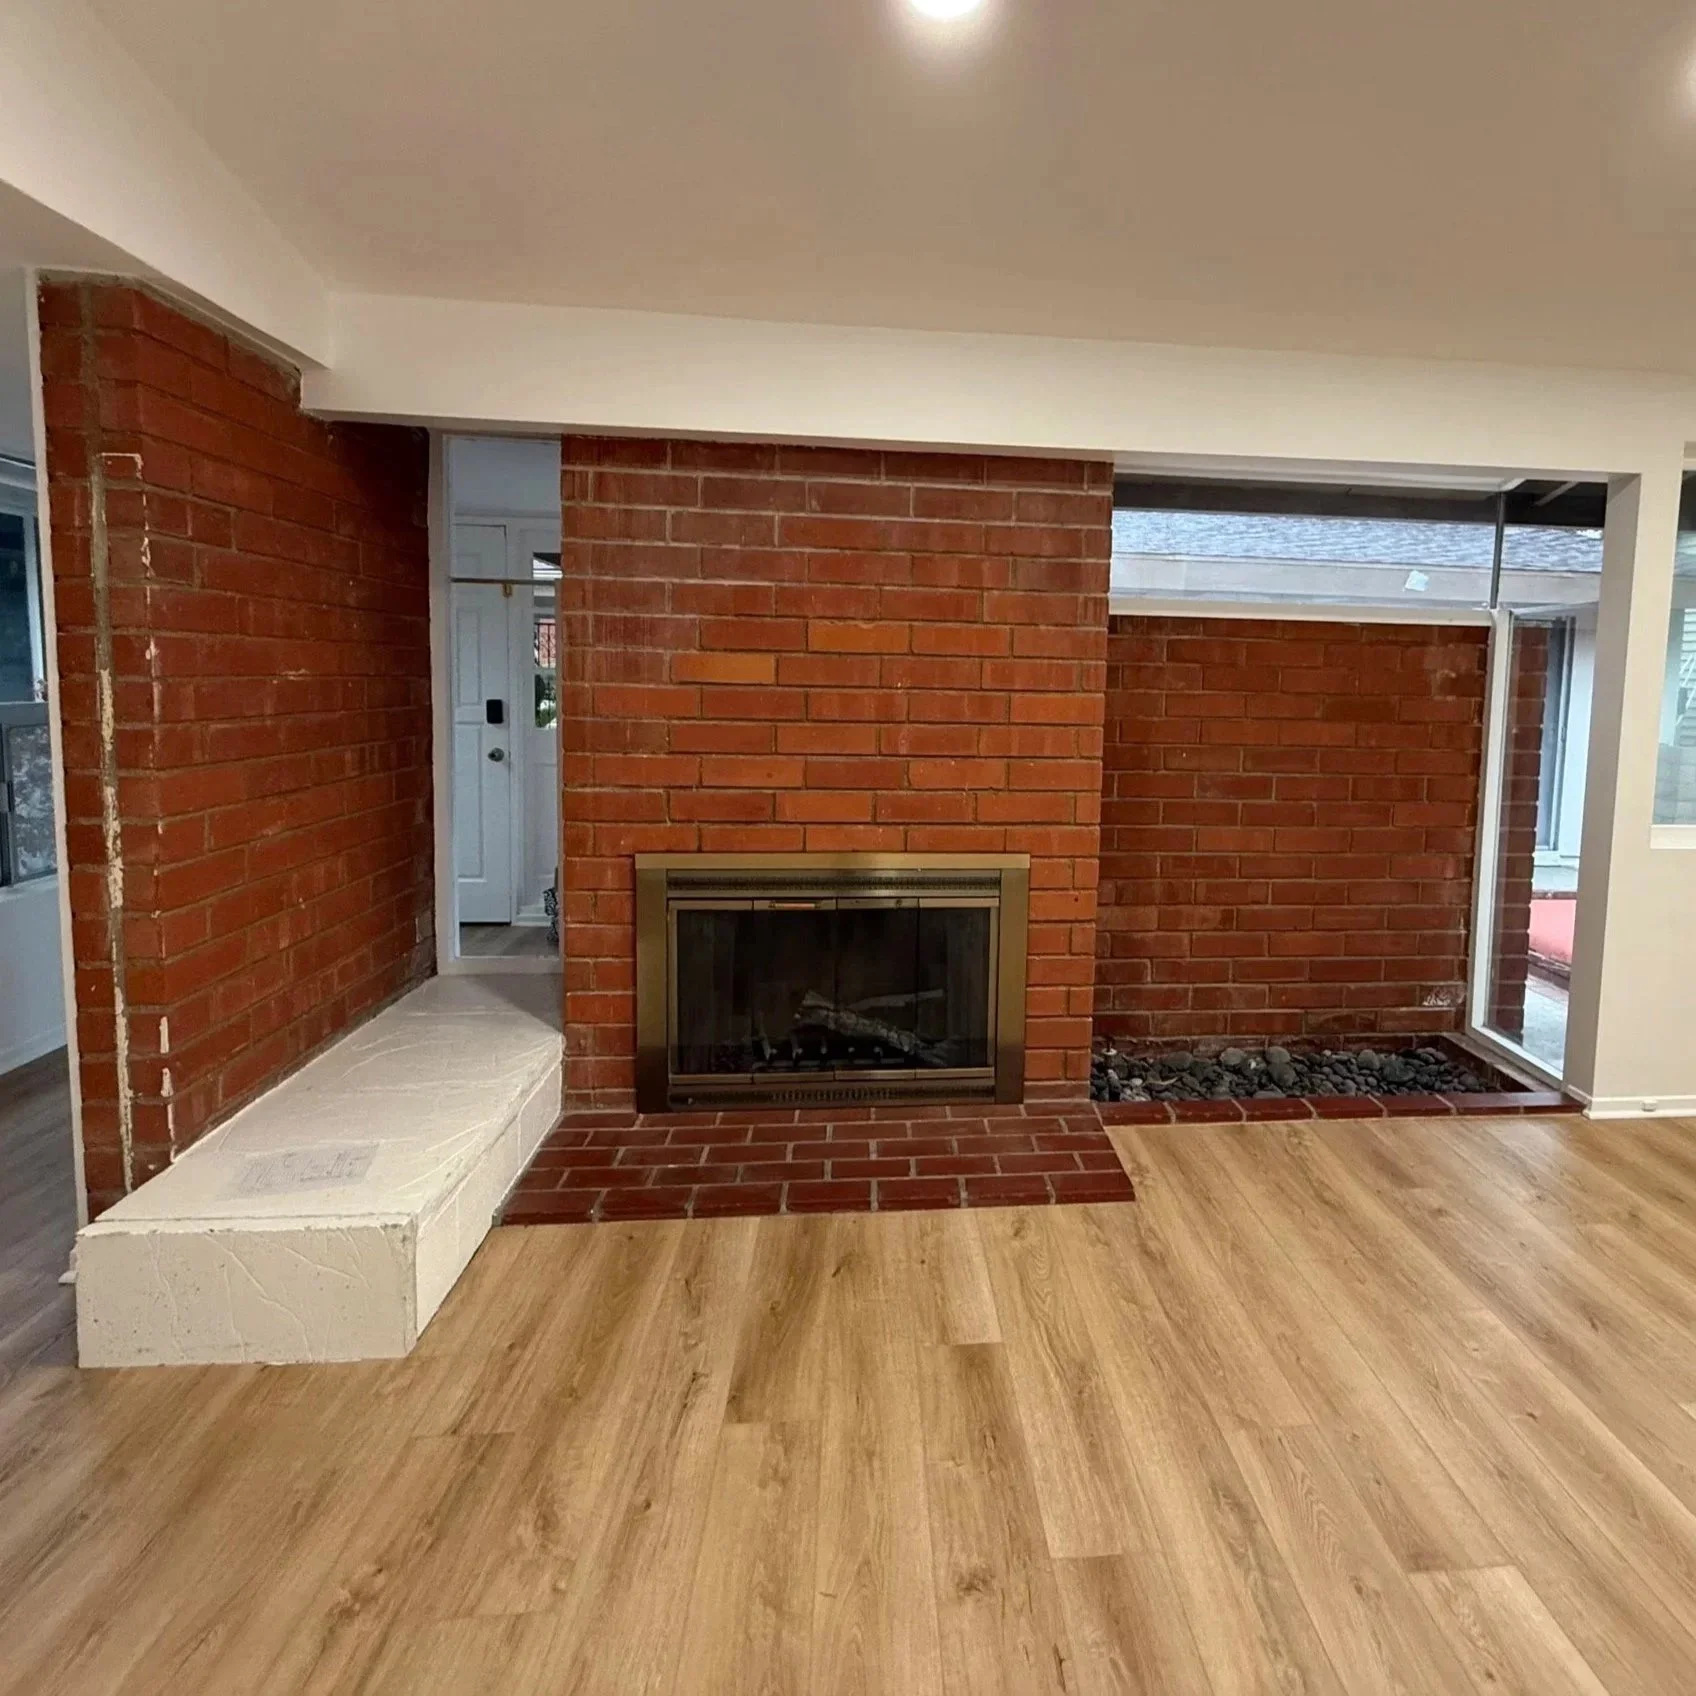
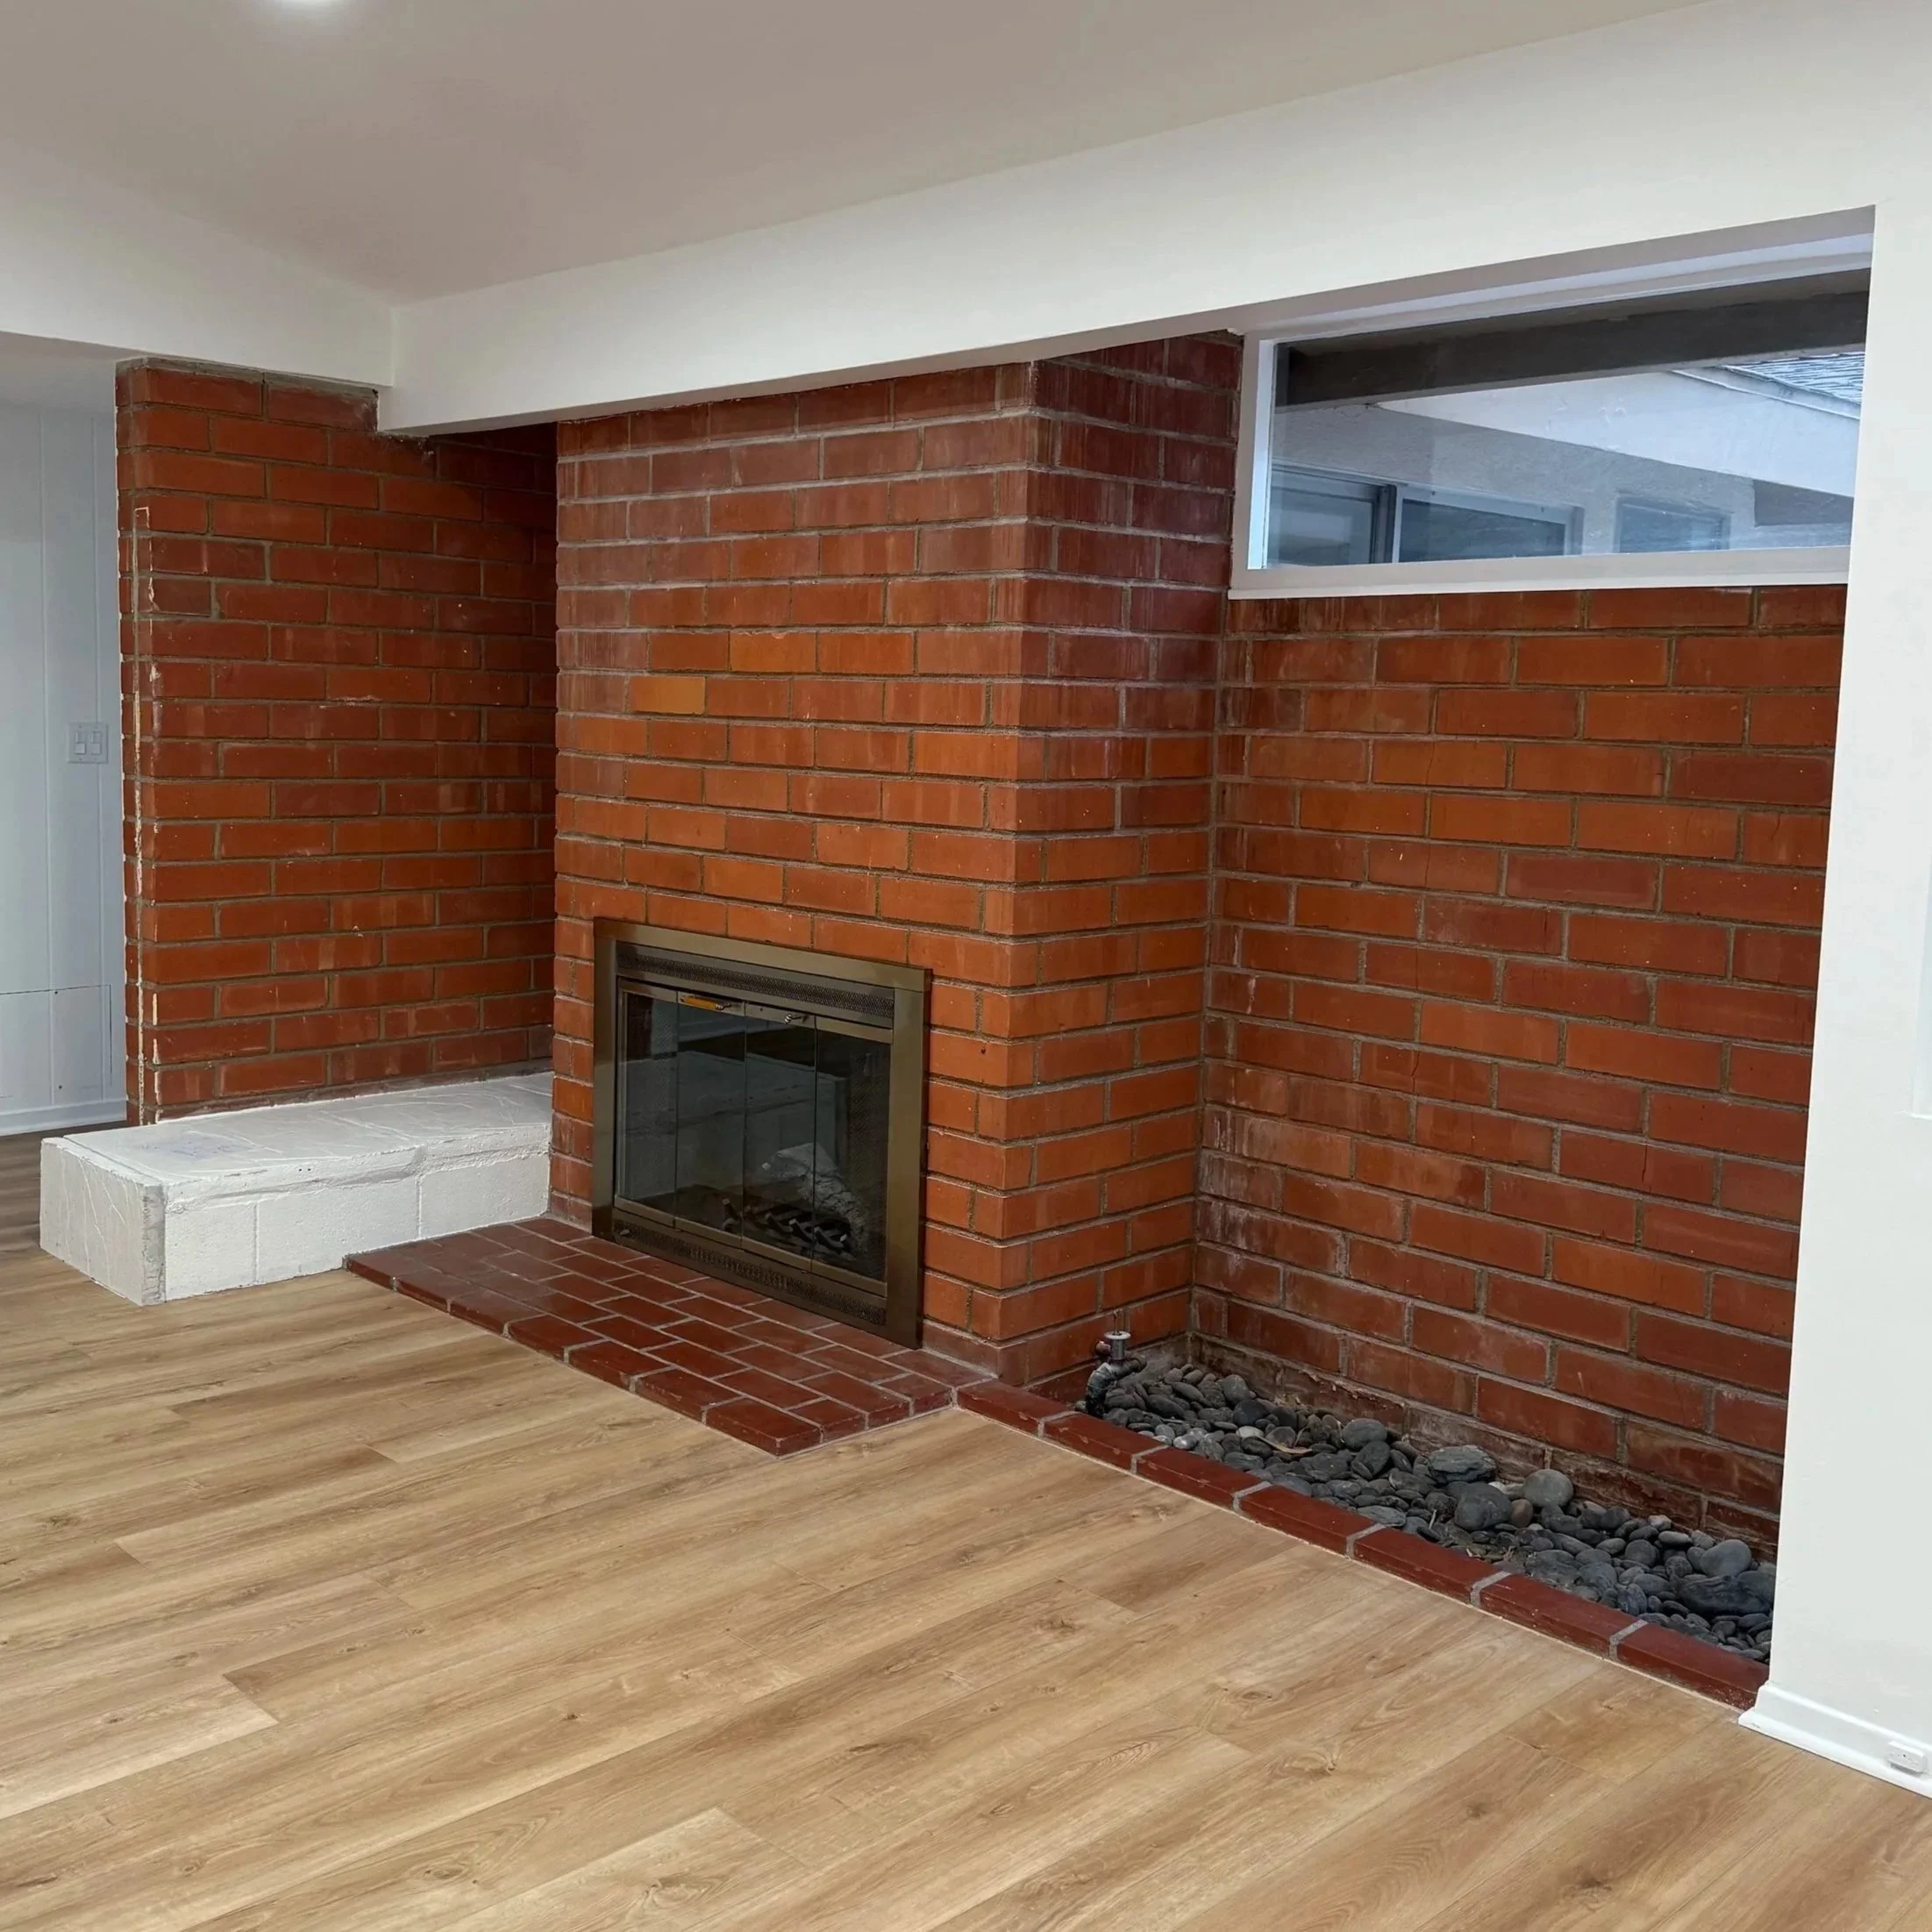
We hired a contractor to remove the windows, frame in, concrete, stucco, drywall and add electrical. We added electrical over the fireplace so we could hang our TV there. We also added an outlet inside the fireplace opening so we could add a gas insert that ignites electrically. I’ve always wanted one of these inserts and let me tell you- it’s now my favorite thing in our house!! We also added an outlet in the space that would become shelving so I could plug in my candle warmer and our wifi router.
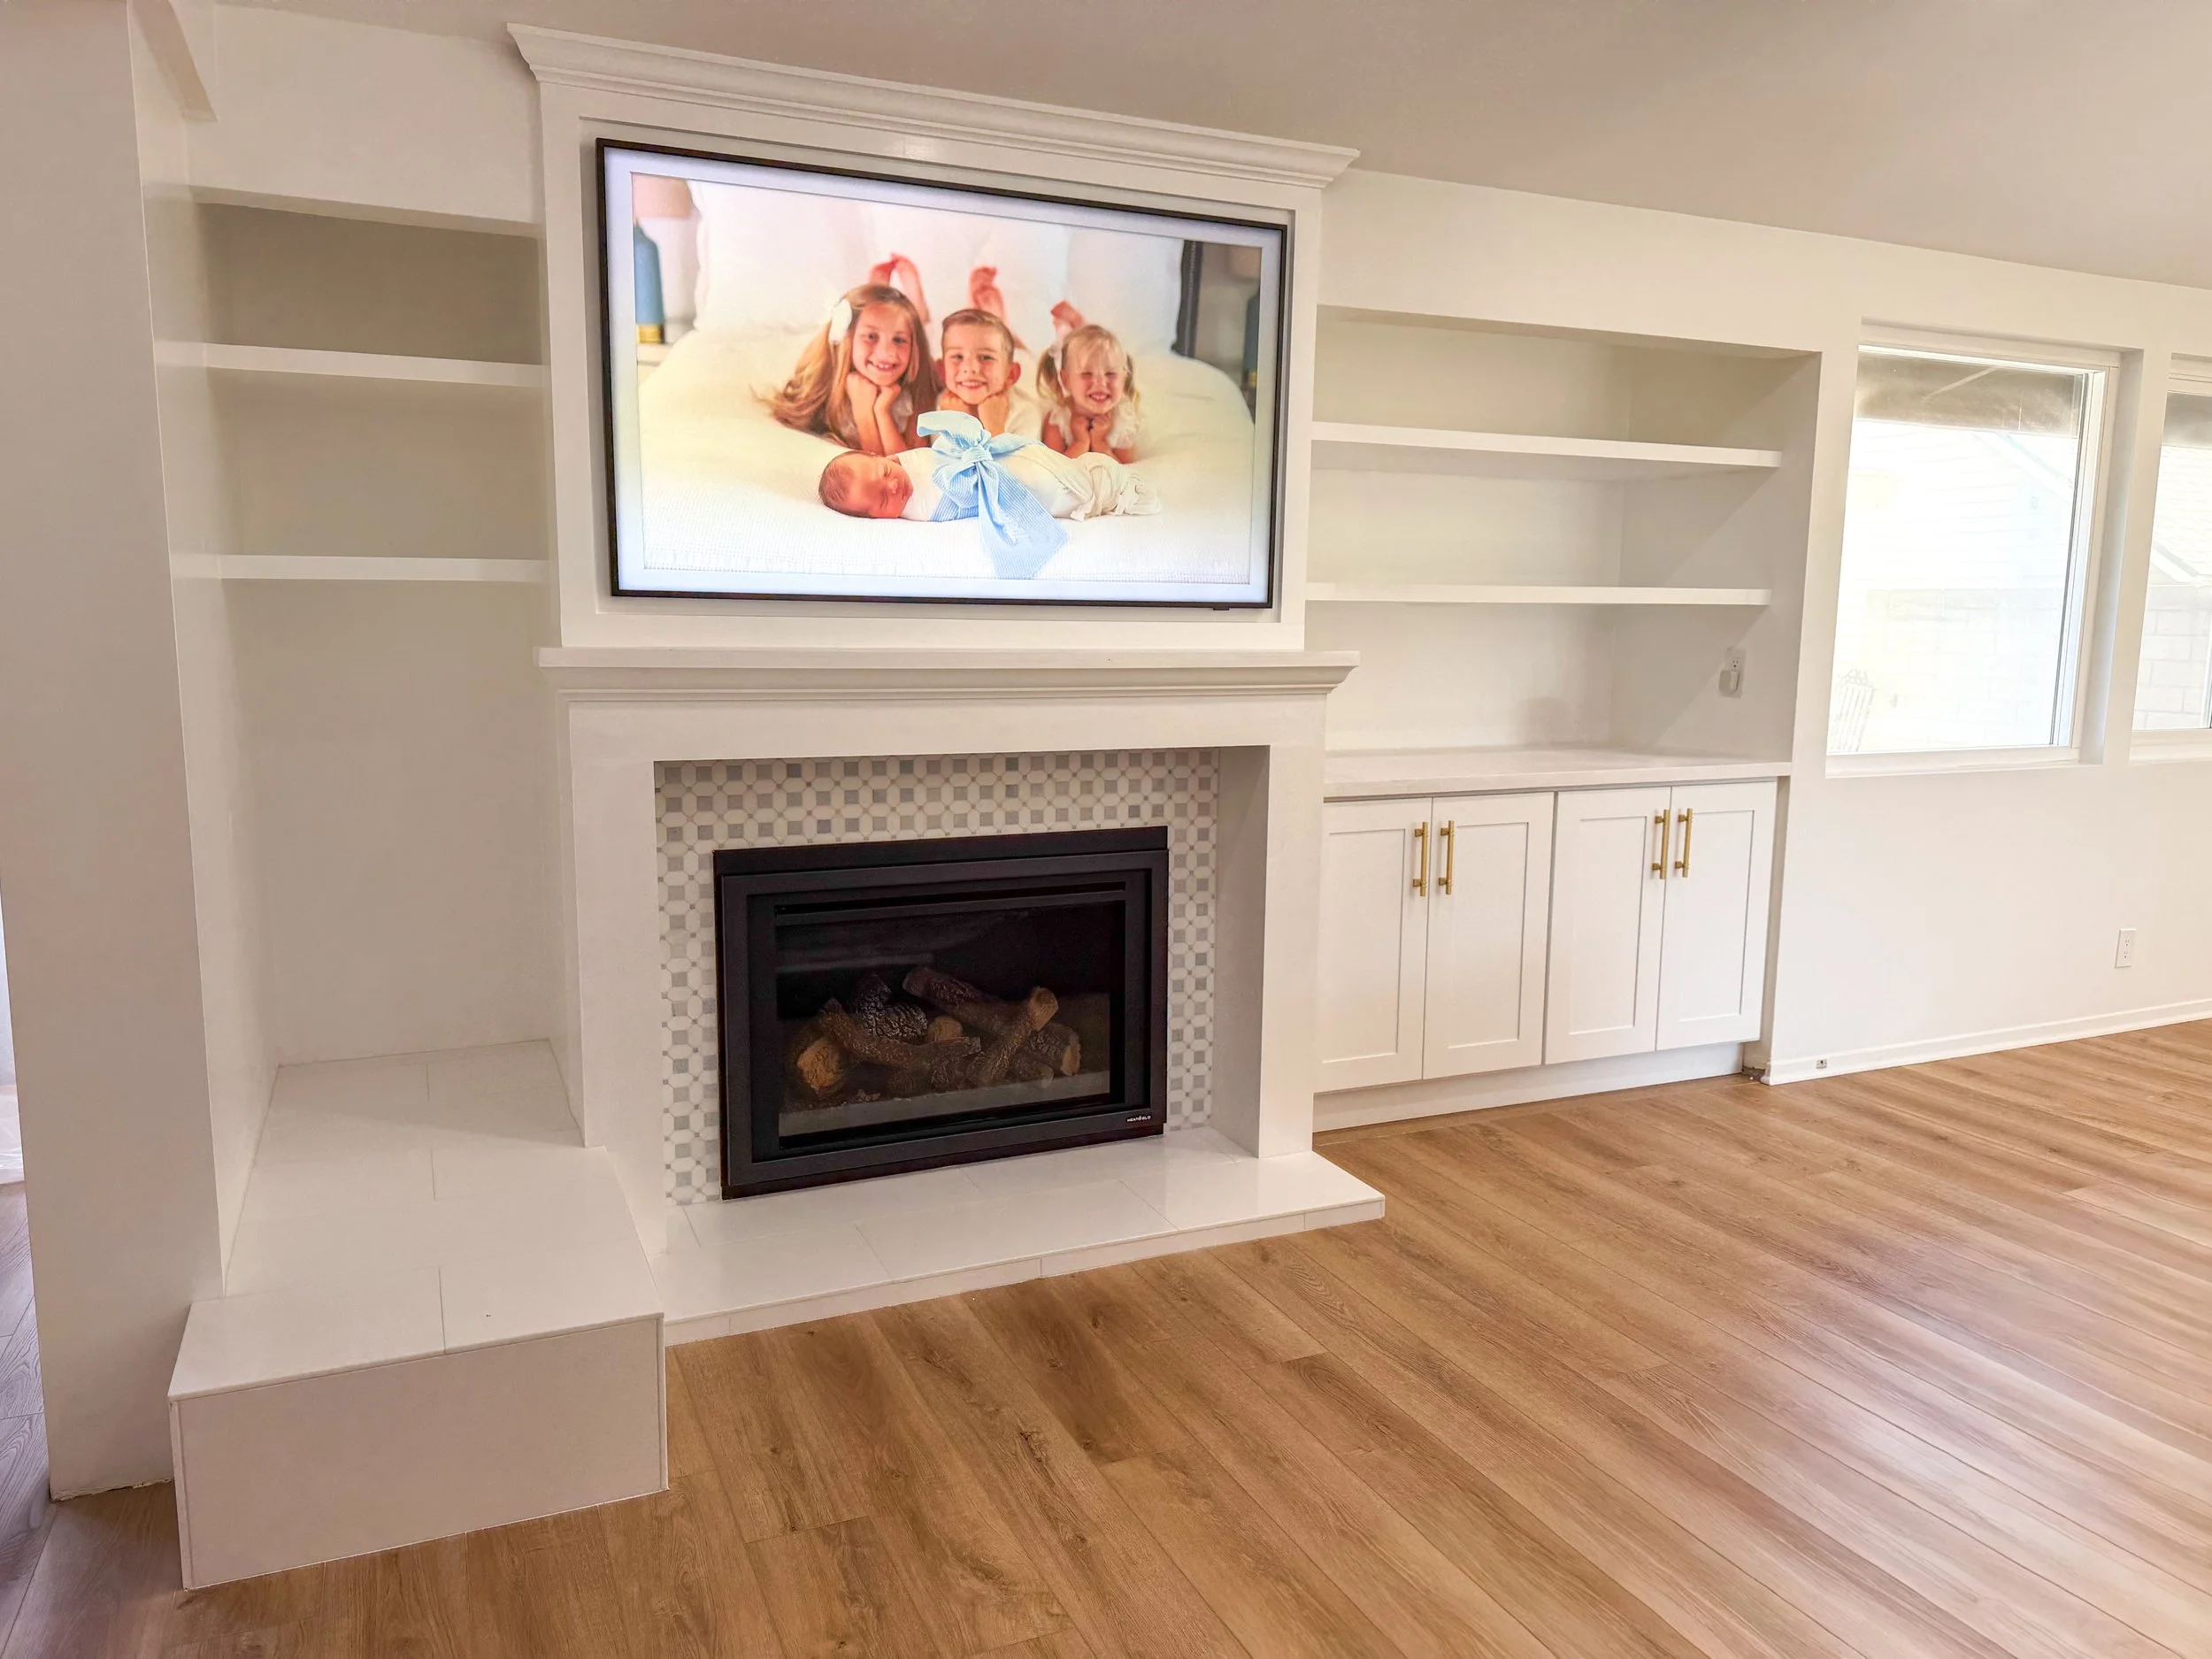
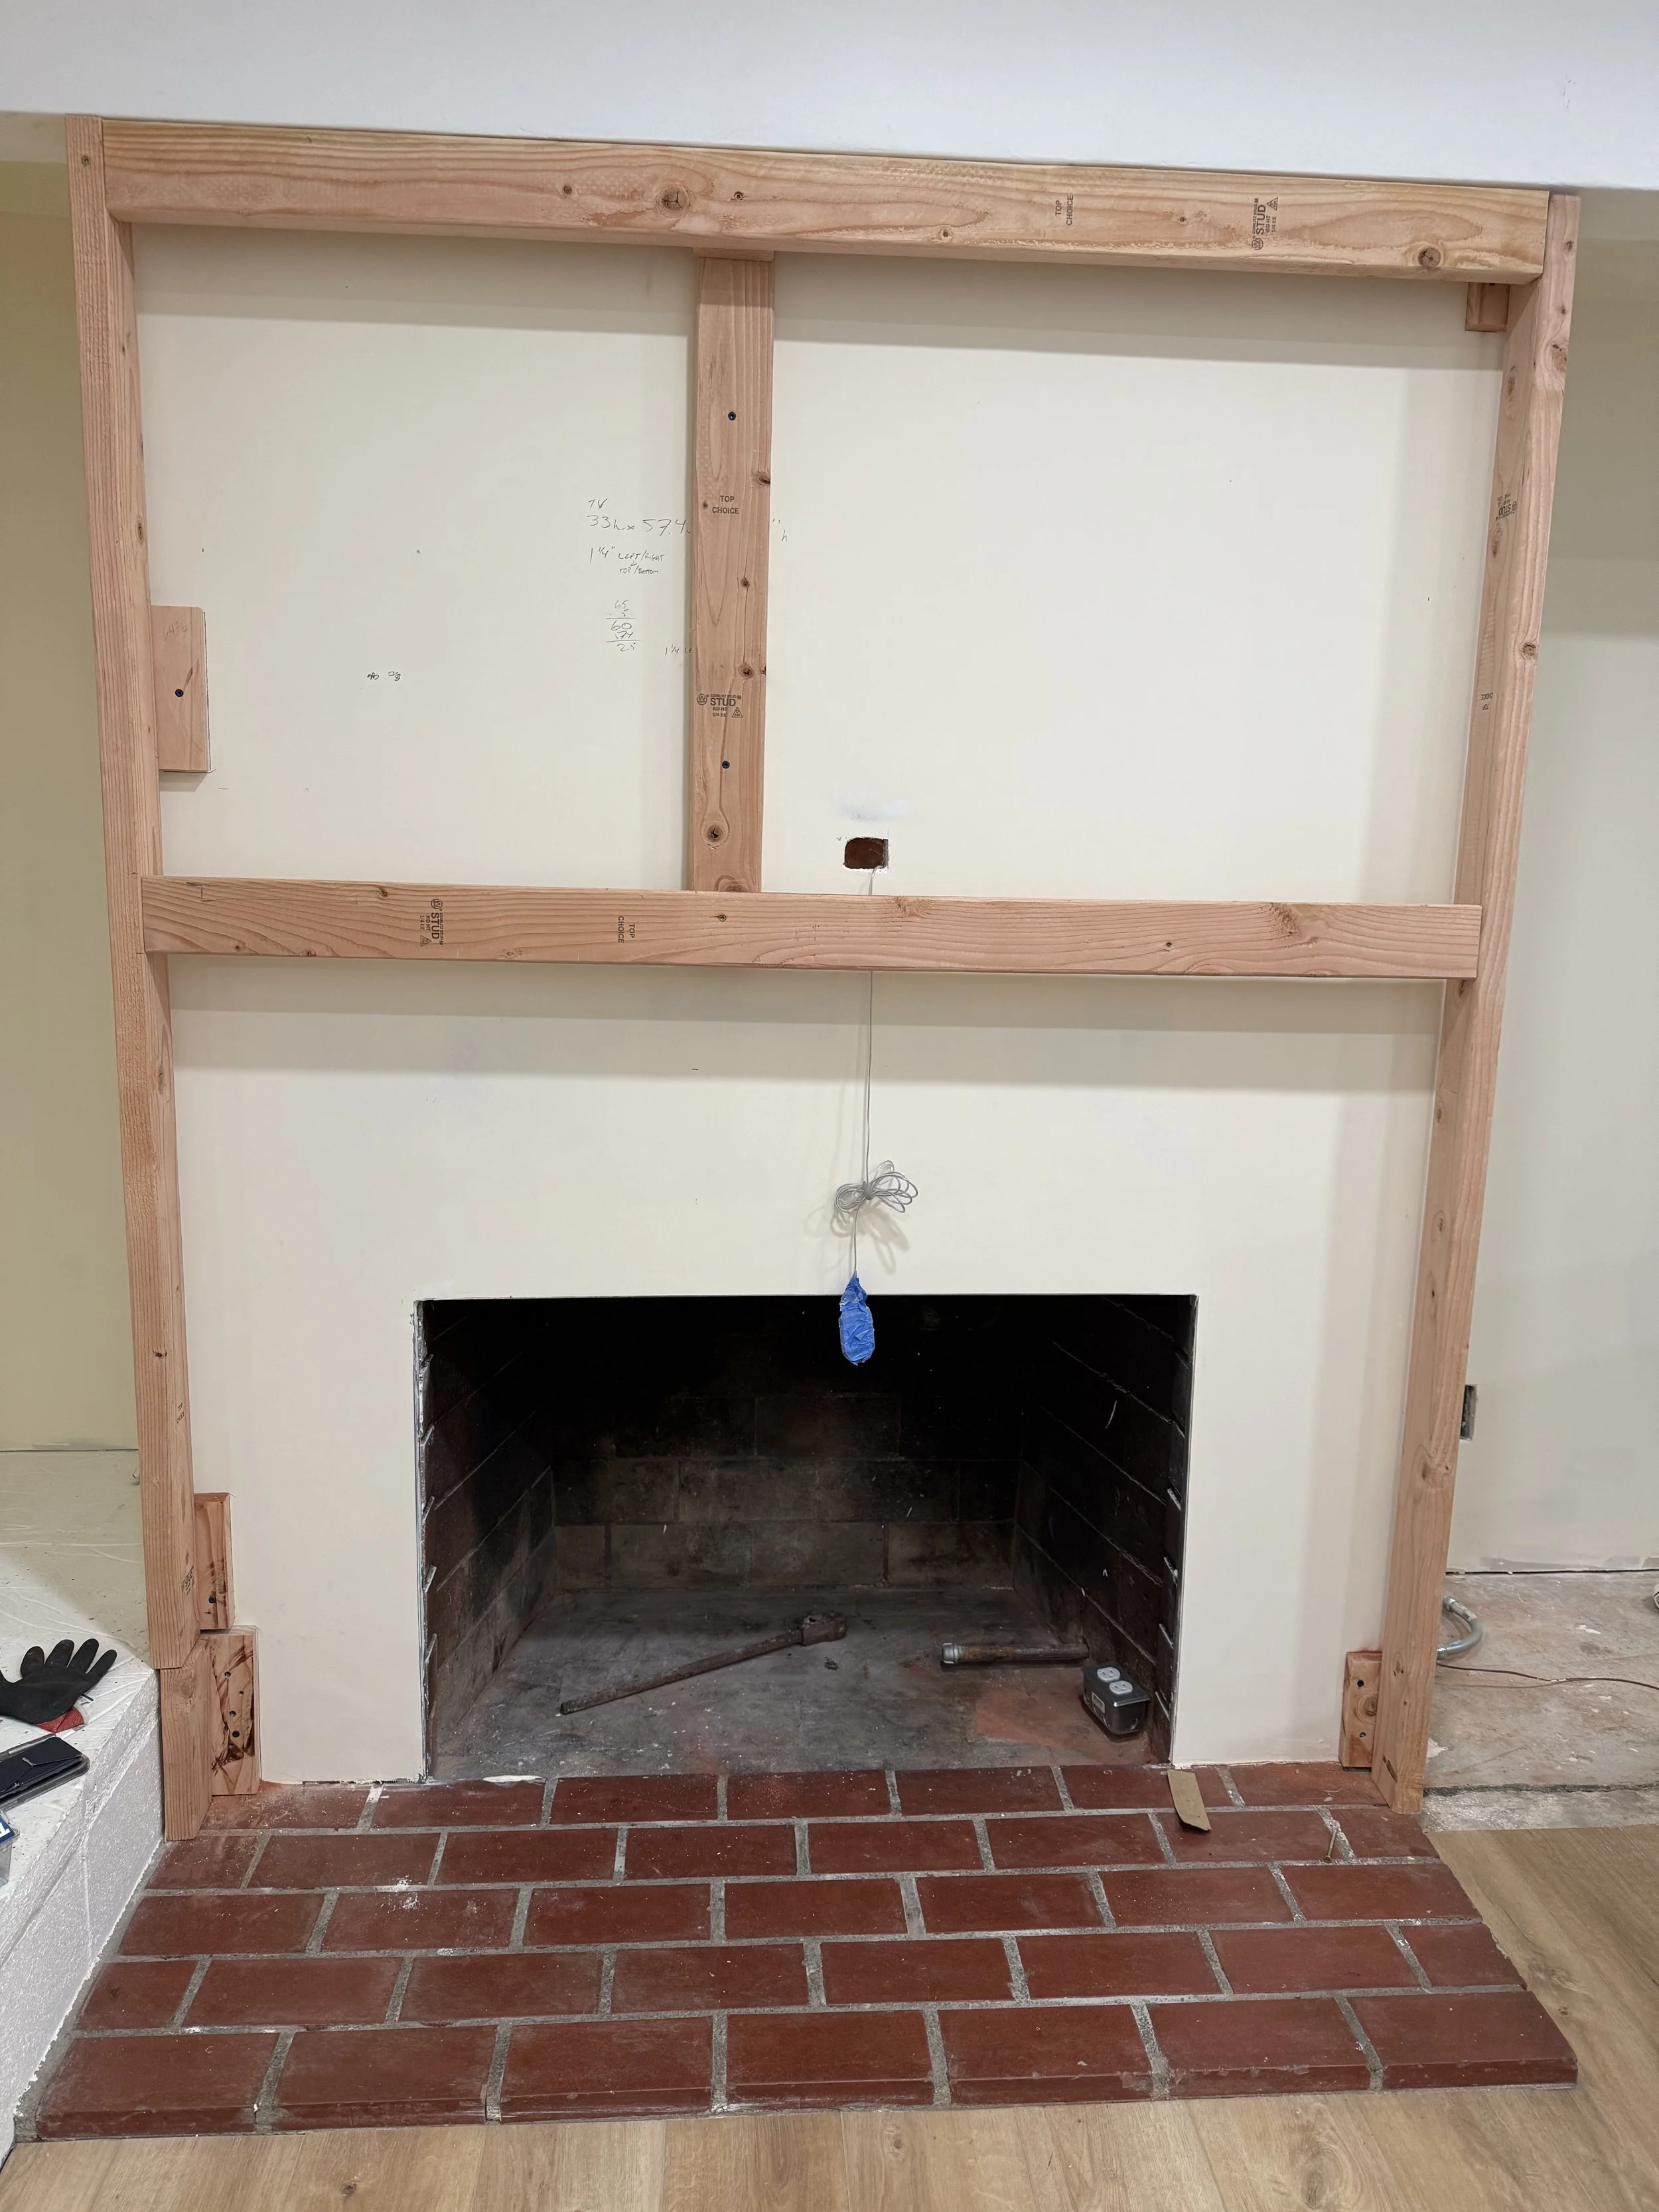
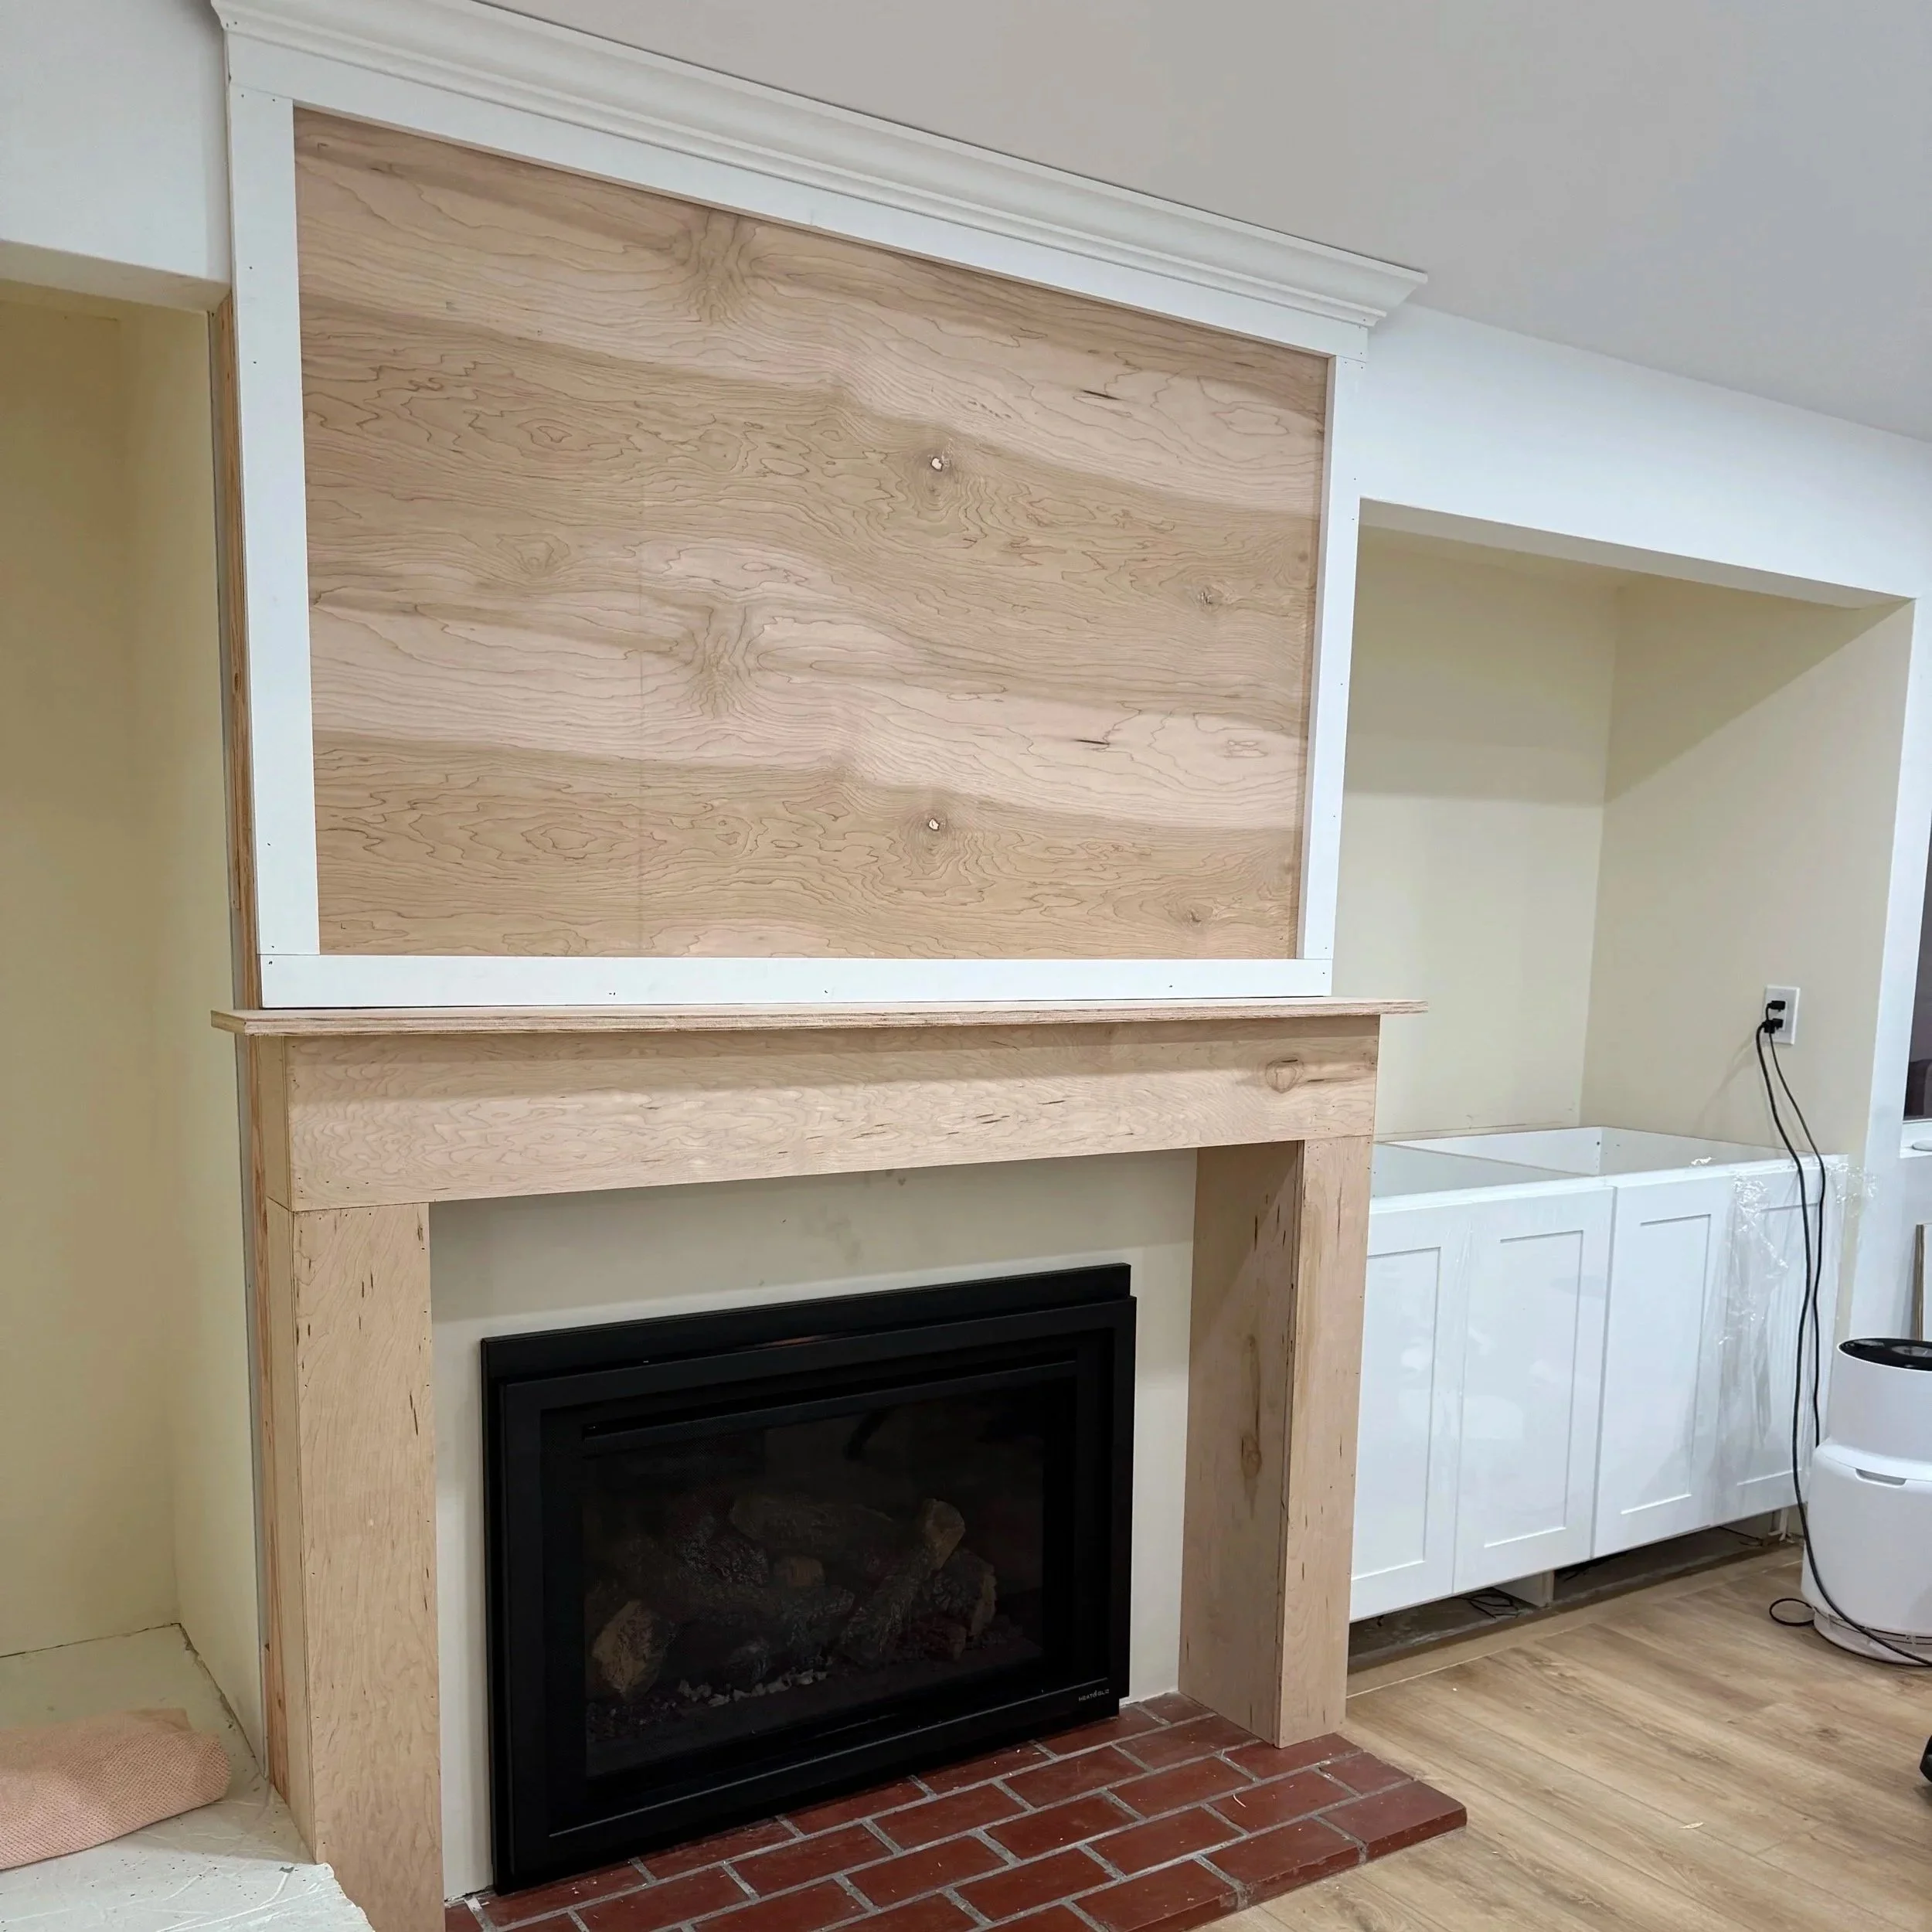
Once the contractor was done with all the rough work we got to work on the fun part! Except that we did make one little mistake that required us to do a lot of extra work! There was a beam running across the top that was going to require our TV to have to hang really low. In order to fix this we had to build out the fireplace surround farther. It was a bummer to cover up all the fresh drywall and definitely took some extra time but in the end it was worth it! My husband built a frame out of 2x4s and then put quarter inch plywood over the front. We also used flat trim molding to box in the front and make it look more custom. We topped it off with crown molding and then it was time to move on to the mantle.
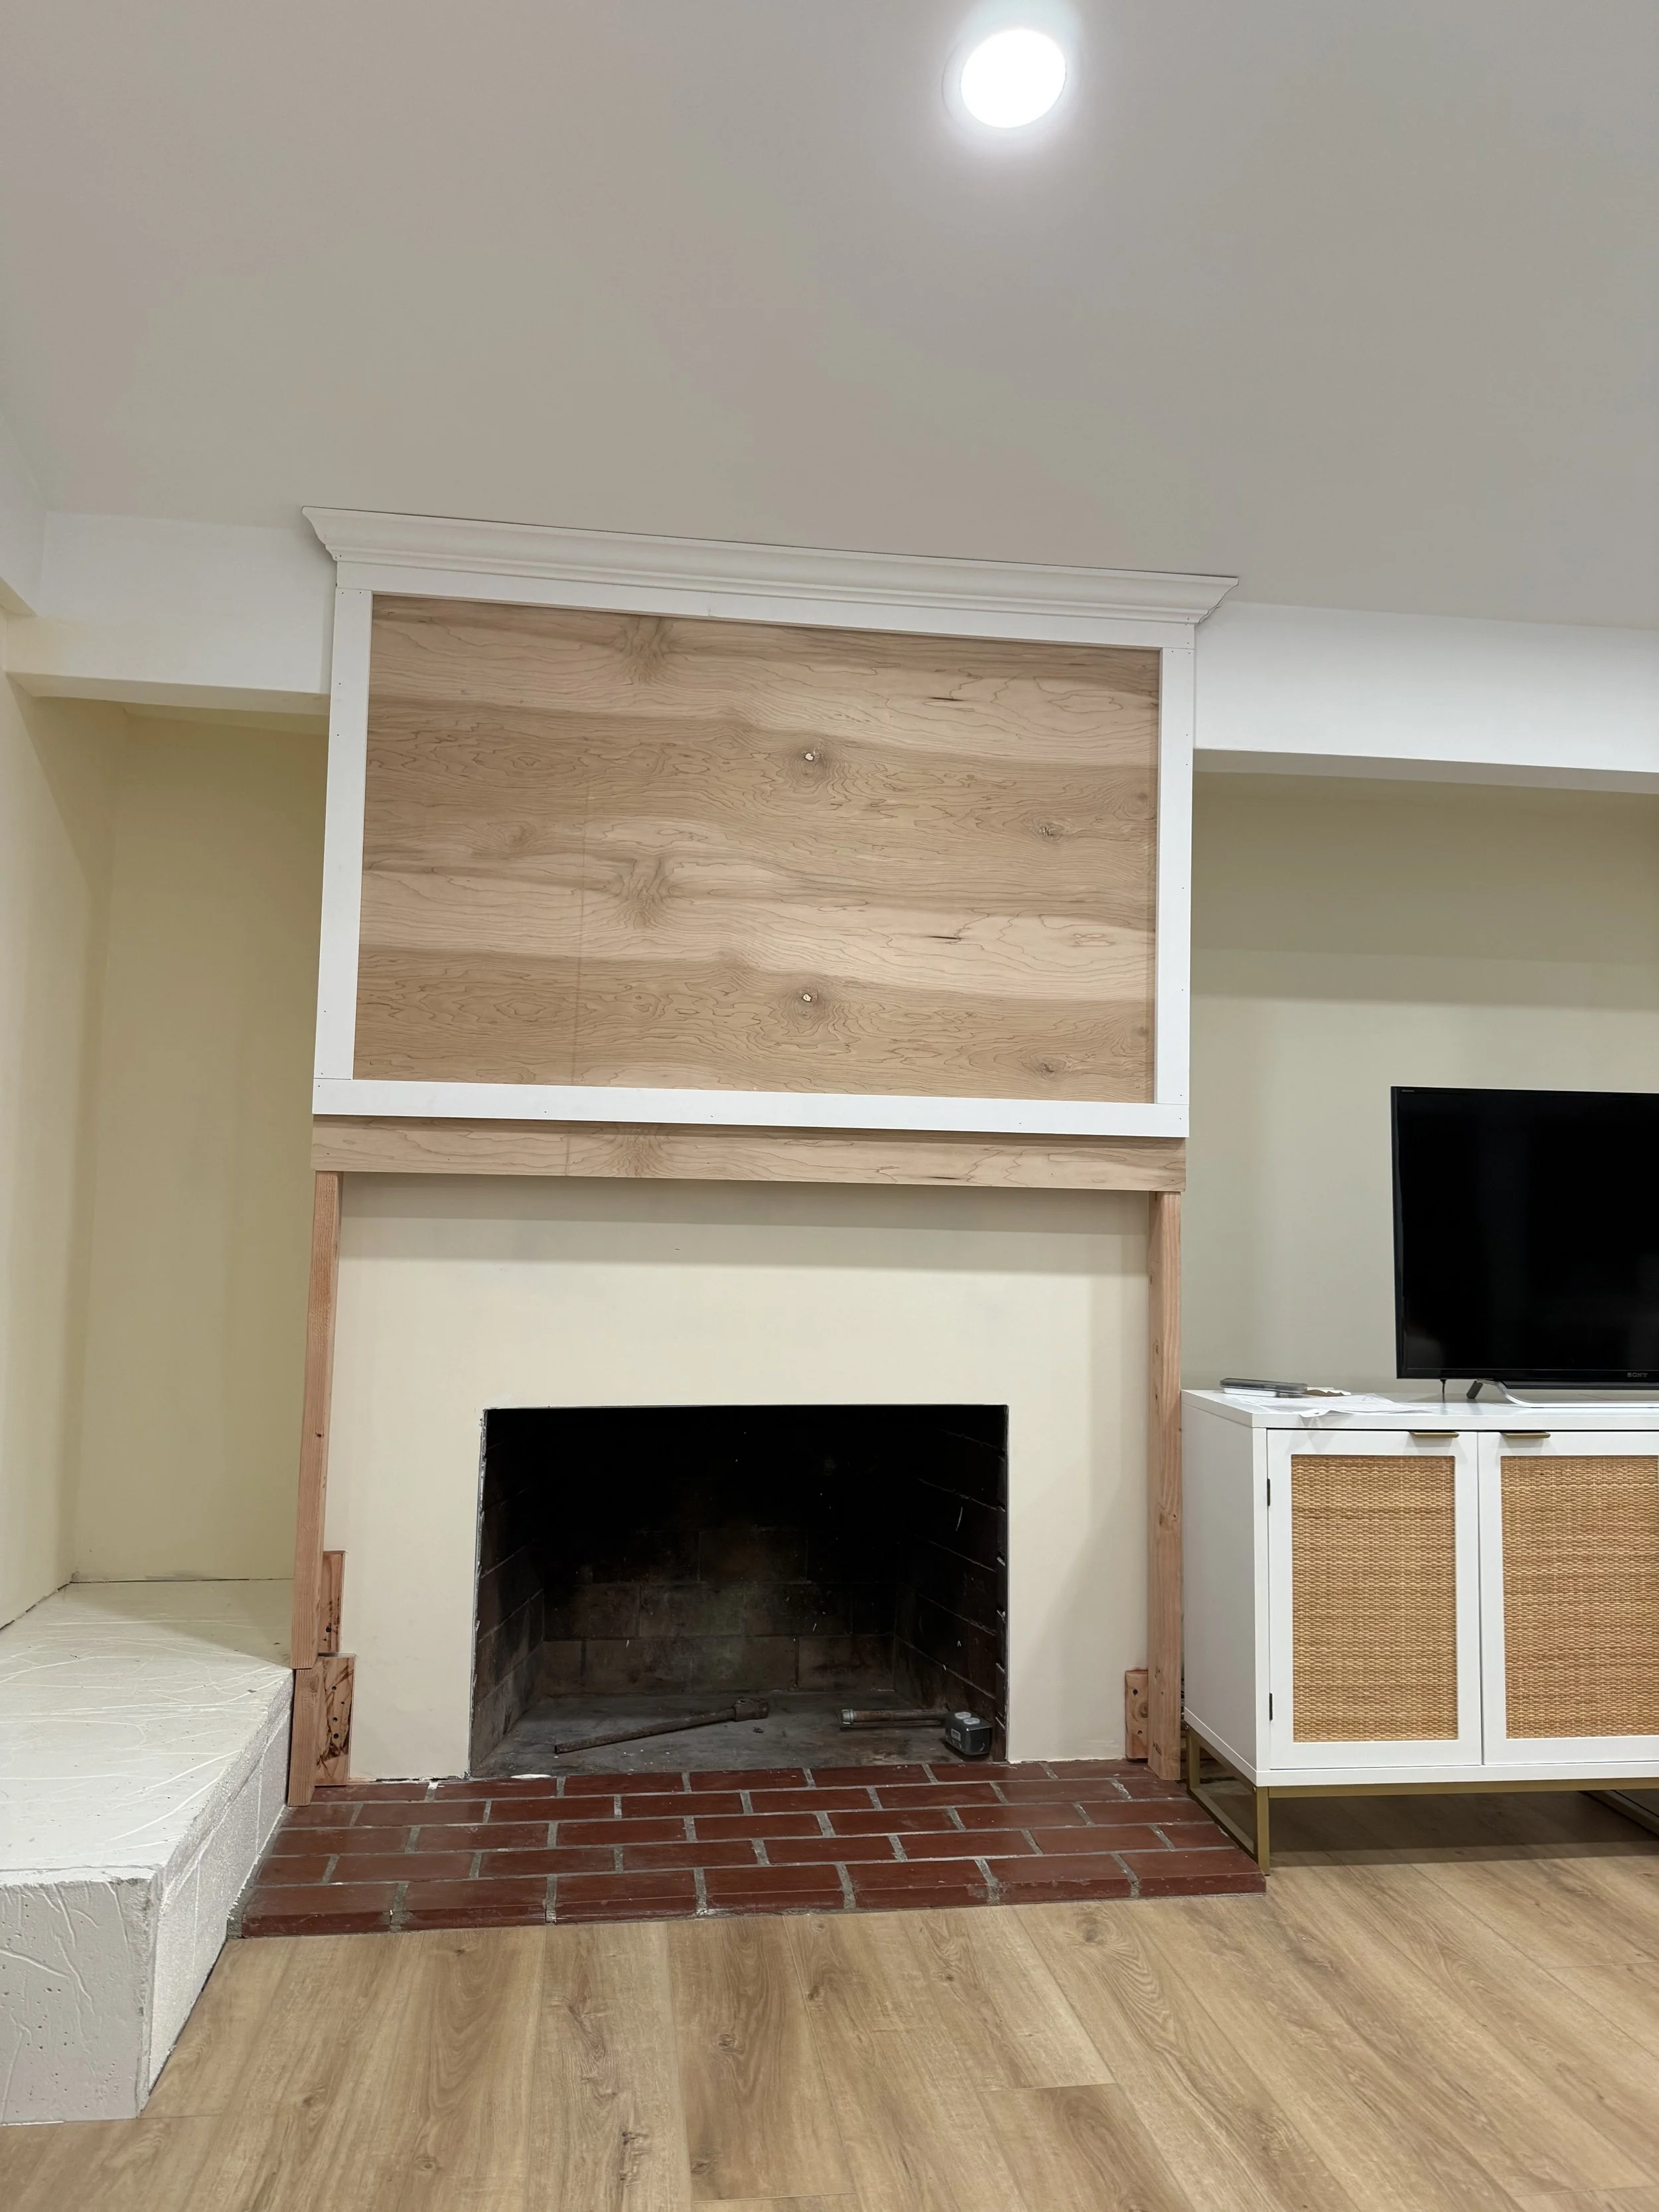
We ordered prefabricated cabinets from a local cabinet company and had them installed next to the fireplace. Next we built the fireplace mantle and attached it to the fireplace already built and then started working on each of the legs going down. We used three quarter inch plywood on the mantle shelf and quarter inch on the box below it as well as the legs. We are eventually going to add decorative trim to the mantle but we ran out of time and needed to simplify the project in the short term. We had a professional company install the fireplace insert and it gave such a clean look! It’s a gas insert that puts off a real fire but it has an electric ignition. It also keeps the fire behind glass so it’s really clean and safer with kids!
Next we added a wood top to the cabinets as well as floating shelves on either side of the fireplace. We used three quarter inch plywood for the top of the cabinets and doubled it up to make it thicker. We also used a single piece for the shelves. We cut out wood cleats as a way to attach the shelves on to the wall and added quarter inch plywood on the front and bottom to box it out and make it look clean.

We added crown molding under the mantle shelf and then spent DAYS wood filling, sanding and caulking. Honestly that is the worst parts of these projects! Next was a ton of coats of white paint. We used a Semi Gloss sheen so it would be wipeable and clean. The more matte paints are hard to clean and since this space will get used and decorated a lot I needed it to be durable. We had our contractor come back and do the tile for us as well. We were planning on doing this ourselves but honestly with 4 kids and the holidays approaching we just didn’t have time. Since we hired out the tile we decided to have them go over the entire bench as well. We also ended up going for marble tile which needed to be mitered, sealed and honed on the edges- those are things we wouldn’t have been able to do ourselves.
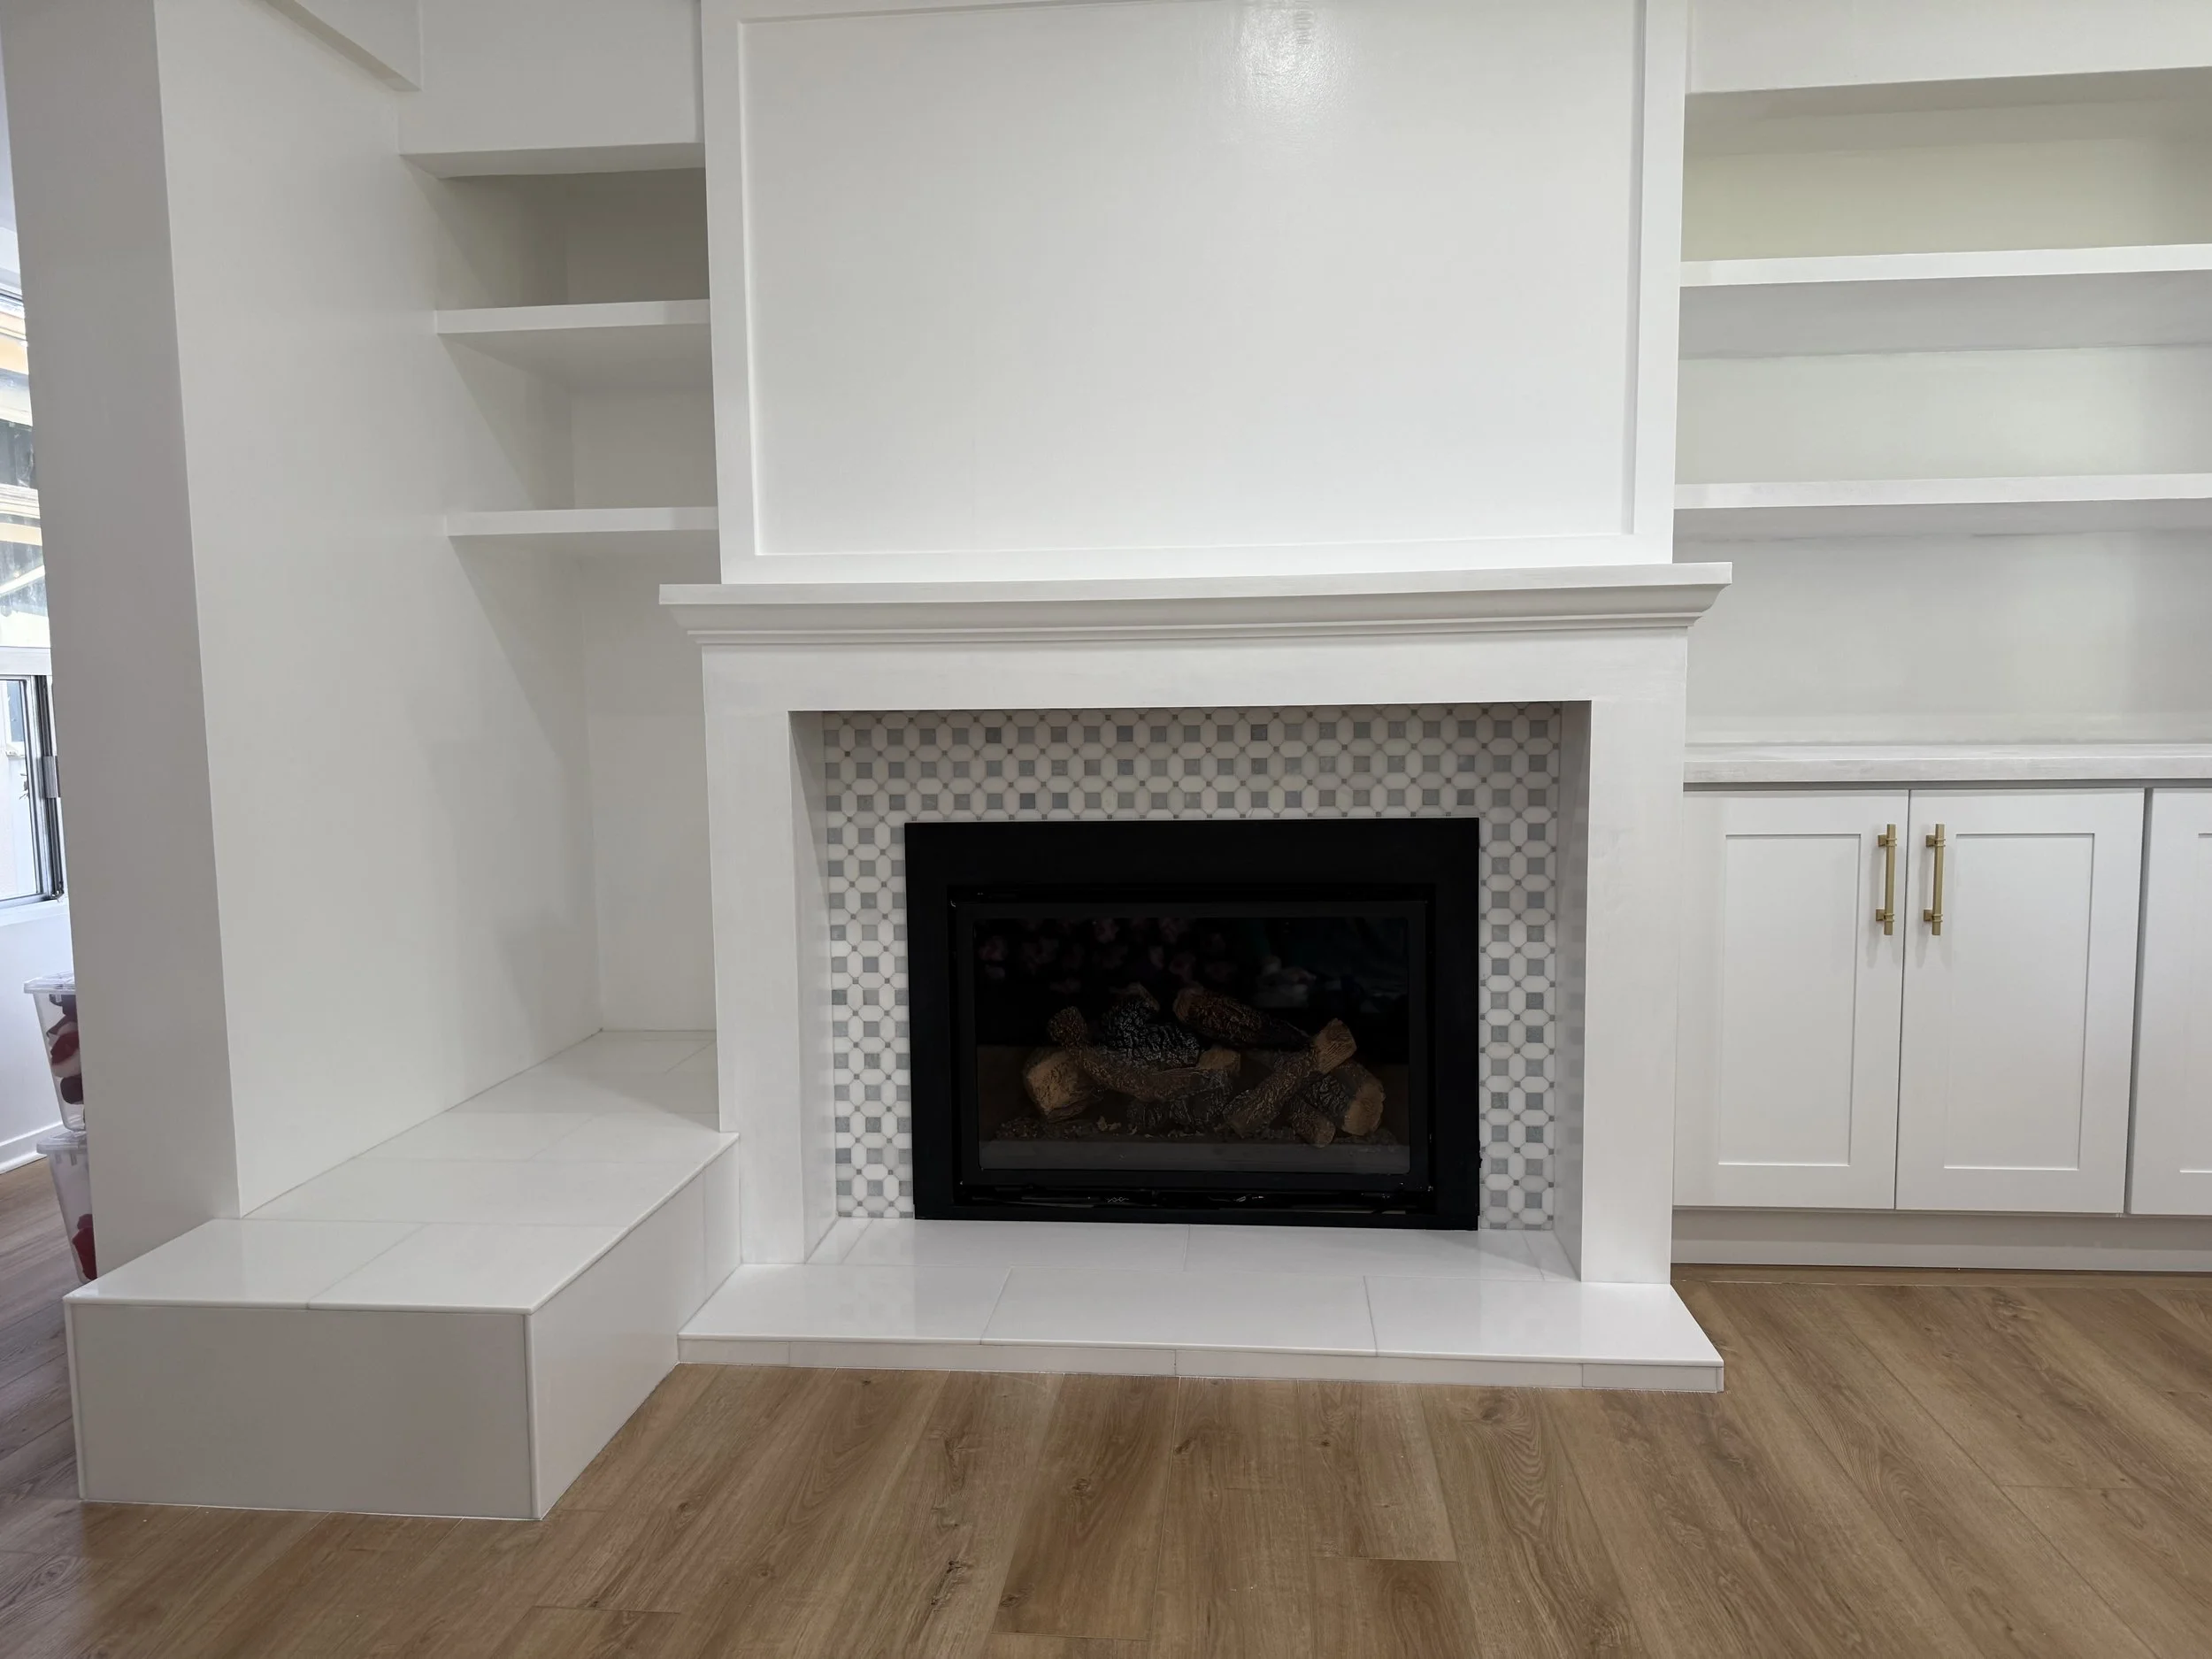
The last step was to hang our Frame TV over the mantle. I think it turned out so good! We still plan to go back and add more trim to the mantle and if you look closely it could use some more coats of paint. But We finished this right before Christmas and it was time to say “good enough for now!”

Here is a before and after so you can see side by side the difference! Let me know what you think and be sure to come back and see more projects we do on our house!